Overview and Setup
Updated: 6 Jul 2026
Updated: 6 Jul 2026
An overview of ONNX models and their use in Notch.
Please note that we provide an integration to load ONNX AI models in Notch. However, we do not provide support for creating, training, modifying, or troubleshooting ONNX models. We do not guarantee that all ONNX models will be compatible with Notch, specific GPU architectures or driver versions. The AI model space is highly dynamic and you should undertake significant testing before attempting to deploy a specific model in your production environment. See Overview and Setup of the manuals for a guide to the setup of, and requirements of, ONNX models.
There are also complete integrations of AI models already inside of Notch, for example in the Yolo, AI Hand Tracker and AI Face Tracker nodes. There is information on using these nodes in their respective sections. But this guide is focussed on using other models.
New in Notch 2026.2, you can now and import ONNX models, which will then be optimised for use inside of Notch, inside of the AI model Post-FX node. You can find many ONNX models online, which you can then import into Notch, or you can train your own.
An ONNX (Open Neural Network Exchange) model is a machine learning model saved in an open, standardized file format that allows AI models trained in one framework to be imported and run in another. What this means in practice is that they are flexible enough to be used on many different machines in different environments. However, because of the wide range of applications of ONNX models, not all of them will be usable in Notch.
Keep reading for examples of ONNX models that have been used inside of Notch, and keep up to speed with the community to see what other people are using.
2026.2 brings the first implementation of ONNX models within Notch, achieved via the use of the AI Model Post-FX node. Due to that, only image to image models will be supported. This is still an area of development for future releases.
Whilst ONNX models are transferable between different environments, they can be created in a manner that ties them to certain architecture. If you are having issues with an ONNX model not loading inside of Notch, it is best to find the original model in a PyTorch framework, and build your own ONNX model from it.
Some ONNX models will import and work straight away inside of Notch. Others, that use dynamic tensors, will need some setting up. See Managing ONNX Files in Inspector for more information.
A .trt file is a TensorRT engine file. You don’t need to create, download or import .trt files at all, but it is important to be aware of them as they are key to how ONNX files are used within Notch.
As you import an ONNX model as a resource into Notch it will take some time, during which a .trt file is being created in the same folder that you have imported the ONNX file from.
A .trt file is a version of the ONNX model, but optimised for the GPU, driver version and CUDA version that the model is going to be used on. It is these .trt files that are actually being used by Notch. This gives the advantage of improved performance, but it does mean that the .trt file will be specific to the GPU, driver, and CUDA version it was compiled and optimised for. See the section Moving Between Machines for more information.
These steps must be followed before using AI models either inside of Notch, or inside of Notch Blocks or Standalone projects.
To get started with using AI models inside of Notch, you will need:
Install Cuda 12.9 with the link below: https://developer.nvidia.com/cuda-12-9-1-download-archive?
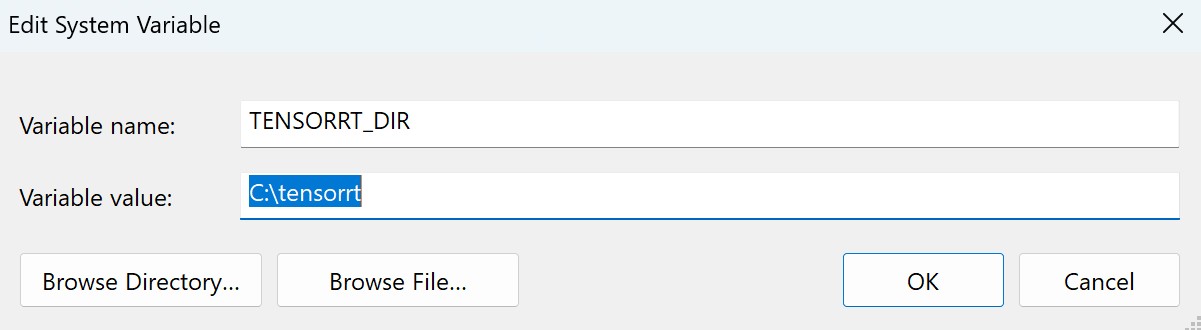
Create a directory for the TensorRT DLLS. We suggest using c:\tensorrt, but you can use other locations on the machine as required.
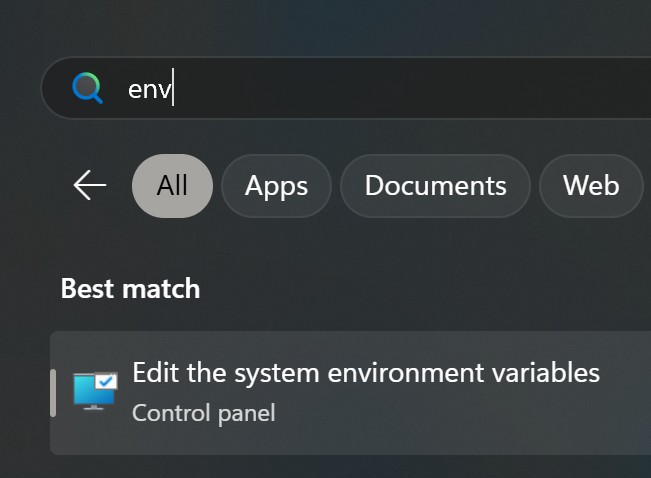
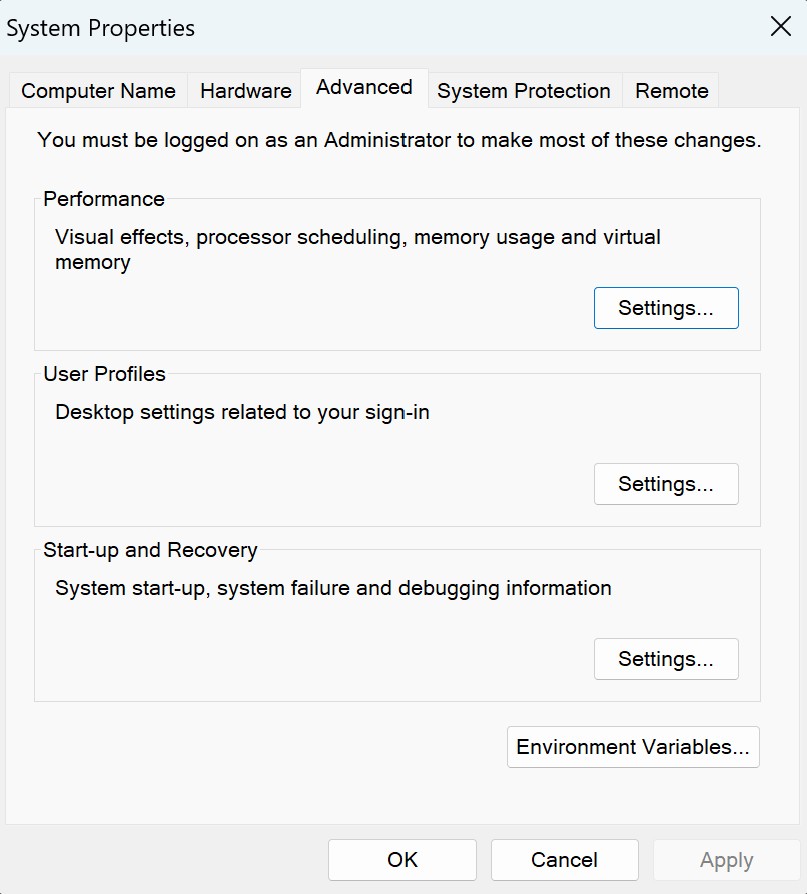
Set a System-wide environment variable called TENSORRT_DIR. This is going to be used by Notch so that it knows where to look for the resources it needs to work with ONNX models.
This can be done by searching for “Edit the system environment variable”
Download the TensorRT 10.15.1 for your installed Cuda version from the Nvidia website, this can be found at the following link: https://developer.nvidia.com/tensorrt/download/10x
Once downloaded, move all of the .dll files from the bin folder to your TensorRT directory (in this example c:\tensorrt).
The required Dlls are listed below:
Setting the environment variable requires a restart of builder (in some cases you may need to restart the machine).
Now fire up Notch and import an ONNX model. You can right click in the resource browser palette and then select Import Resource > AI > ONNX Model.
Importing ONNX models is slow, this is because they are being compiled and optimised into .trt files which are used by Notch Builder and Notch Blocks. During this time you will see a window saying “Please wait while importing resource…”. Put the kettle or get a beverage of your choice on, and relax in the knowledge that the time you are waiting now will make your model run much quicker later on.
Import a video clip into the node graph. Then use an AI Model Post-FX node and load one of the ONNX models (or you can drag+drop the ONNX model to nodegraph). Once attached to the video source it will then process the video.
You are now all set to start working with AI models, you can look at some examples in the next sections.
Just like many other resources that can be imported into Notch, ONNX models have properties that can, and may need to be edited. This is handled inside of the Inspector.
Here, you will be able to:
A tensor represents an input to an ONNX model. Many ONNX models will be setup to use fixed size tensors, which means that they will import into Notch as desired without any consideration of tensor dimensions. Other ONNX models however, will use dynamic tensors. This means that they need to be set to an appropriate dimension inside of Notch to make sure that they perform as intended. Some reasons that an ONNX model may use dynamic tensors are:
When an ONNX model is imported into Notch, the software will set the dimensions of the model to useful default values. However, there can sometimes be mismatches with what the model is expecting. The logs will give you useful information in this type of situation (you can view your logs inside of Notch from View-> Log Window).
For us humans using these models, we need to set them up with the correct dimensions so that we can get the results we want. The way to do this is to find the documentation for the AI model, or have something/someone find it for you, and set the dimensions accordingly.
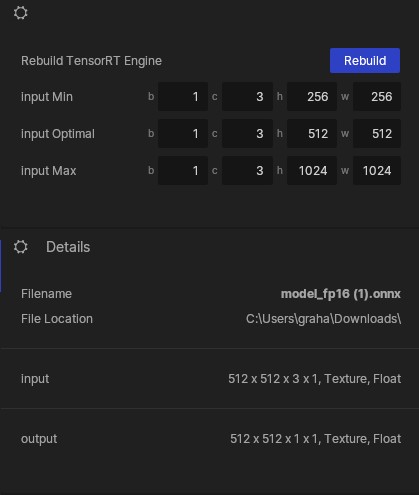
Once you have made changes to the dimensions of the tensors, you will need to rebuild your .TRT file.
You can do this by clicking the “Rebuild” button inside of the Inspector panel when you have your ONNX model selected. This will rebuild your TRT file to re-optimise your setup for the new settings you have entered with the dynamic tensors.
This new TRT file will replace the previous TRT file that was created next to your ONNX file.
Some manufacturers do not support the installation of newer NVIDIA drivers required for CUDA 12.9. Before planning to use the ONNX Model workflow, please verify with the manufacturer that the machine supports the required NVIDIA driver and CUDA version.
Failure to meet these requirements will prevent ONNX models from running correctly on the system.
1 - Make sure you have followed the above guide to set up your environment correctly as outlined in How To Setup To Use AI Models.
2 - Follow the steps to load one of the ONNX files as shown in the example projects to verify that you have set up correctly. If this fails, you may need to uninstall and the prerequisites, and follow the instructions again.
3 - If the example projects are working and your ONNX model is not, verify that the ONNX model:
4 - Check that you have the required VRAM to load, convert and run the model.
5 - If you are still having issues at this point, it is probable that your ONNX model is not compatible with Notch. you will need to assess the ONNX model yourself. Where possible, find the original repo for the model and build your own ONNX model.