Real-Time Reflections: A Practical Guide
Introduction #
Reflections are one of the most important parts of a realistic scene, and often times the different techniques can get confusing or muddled up. Screen Space Reflections? Planar Reflections? Unless you have been following real-time 3D graphics religiously, some of these terms can sound like technical jargon - this guide is here to break these techniques down into simple English, so you can figure out the pros and cons, and which you need to use for any given project. but before we go into it, there is one thing we need to discuss…
Trade offs #
The most important thing you will learn when working with 3D graphics, is that everything you see and do is an approximation. Real life doesn’t have normal maps, my cat isn’t made of polygons, and light is both a particle and a wave - neither of which are rays. These techniques are all designed to as closely as possible approximate how these things work, while minimising the FPS cost - a target that has moved over the last 20 years as technology has advanced (as will this article in about 4 years).
In short, none of these effects are perfect, they all have drawbacks which make them unsuitable in certain circumstances. I’ll be noting and listing those differences as I go, but bare in mind that the choice isn’t just which reflection type to use.
To make the best effect you possibly can, you have to be willing to change your scene to meet expectations. This can be something as small as turning off reflections on some objects, or as large as rearranging the scene to reduce reflective areas.
FPS is king, so if you can’t get the look you want with the techniques and hardware available, changing the look is always an option to keep in mind - and its what AAA artists have been doing since day one. Now with that out of the way, lets look at the tools on offer.
WARNING : These are very common techniques within real-time graphics, and you will not be able to un-see the images here. So if you like the magic of AAA games today, and don’t want to become intimately familiar with all the ways they cut corners, look away now.
Different Techniques #
Environment Mapping #
Environment Mapping is super cheap and basic.
This doesn’t reflect anything in the scene, instead it reflects a connected environment image. This can be useful when you need reflections on rough surfaces, or surfaces where reflections are difficult to see.
Even in the above example, the lack of reflections isn’t particularly noticeable if you break up the reflective area, which is why it is still commonly used for reflections in games today.
| Pros | Cons |
|---|---|
| Really fast Simple setup Ideal for rough surfaces Applies to any surface |
Doesn’t actually reflect anything |
Planar Reflections #
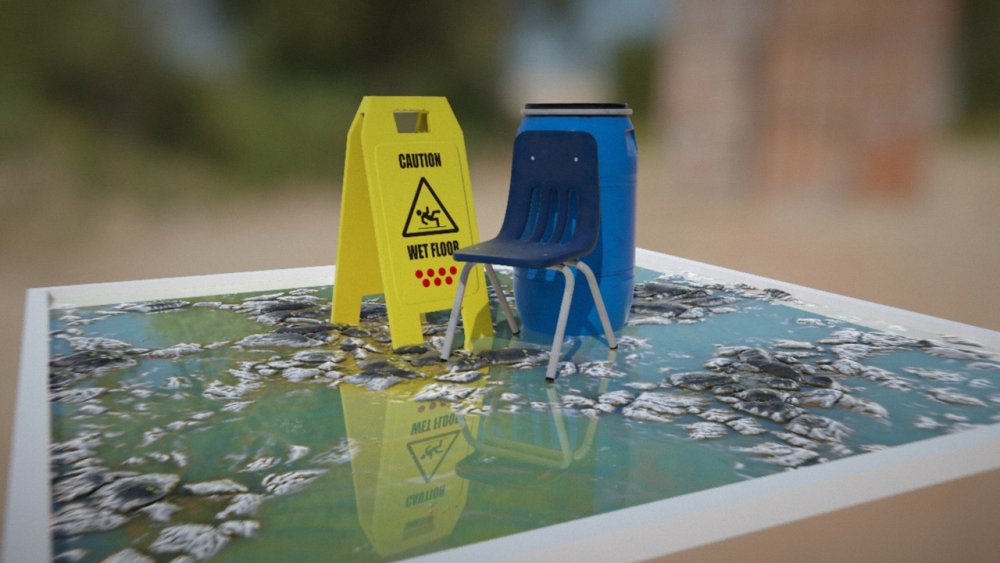
Planar Reflections are another option for cheap reflections, but in the right scene can look identical to path tracing with a fraction of the cost.
Planar reflections are a simple 2D surface that can mirror a scene perfectly along one axis, great for mirrors or shiny floors.
This does mean however, that the reflections cannot be applied to any piece of geometry, the 2D plane generated is the only reflecting surface. Planar Reflections also only use forward rendering (the type of rendering Notch uses while deferred rendering is disabled), so you will be limited to either static baked 3D scenes, or very simplified dynamic scenes.
This is because deferred rendering is required for advanced 3D effects, so if you want to have dynamic shadows, complex surfaces, or volumetrics, you will need to find another option.
| Pros | Cons |
|---|---|
| Fast Fairly simple setup Reflects occluded surfaces |
Limited to single flat surface Incompatible with advanced rendering techniques |
The output of the planar reflections can have Post-FX applied, so if you want a rough reflection just lower the resolution a touch and apply a blur to it.
Screen Space Reflections #
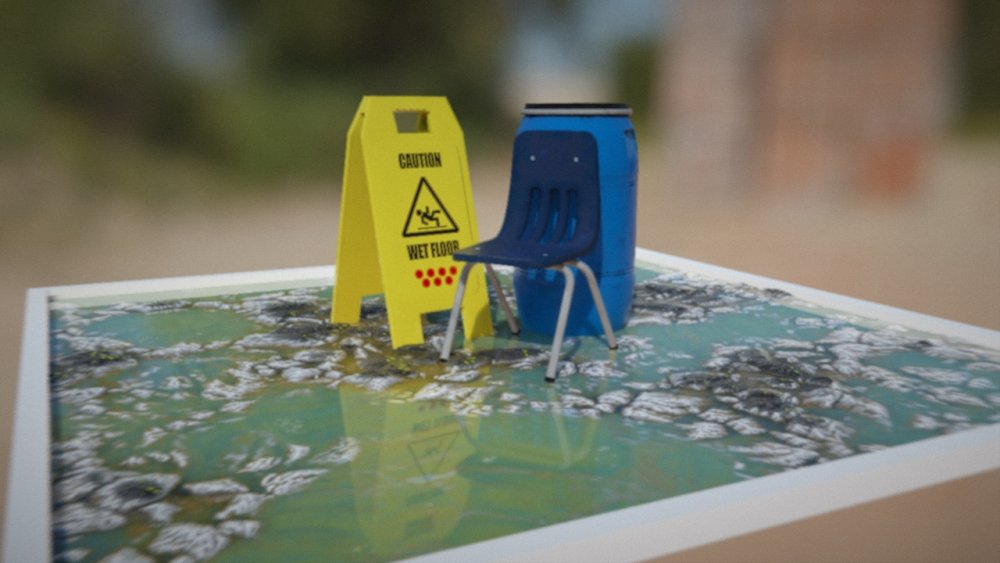
Screen Space Reflections are the fancy new reflection method of the last decade. Expensive with particularly rough surfaces, and has harsh limits on view angles, but it’s popular with good reason.
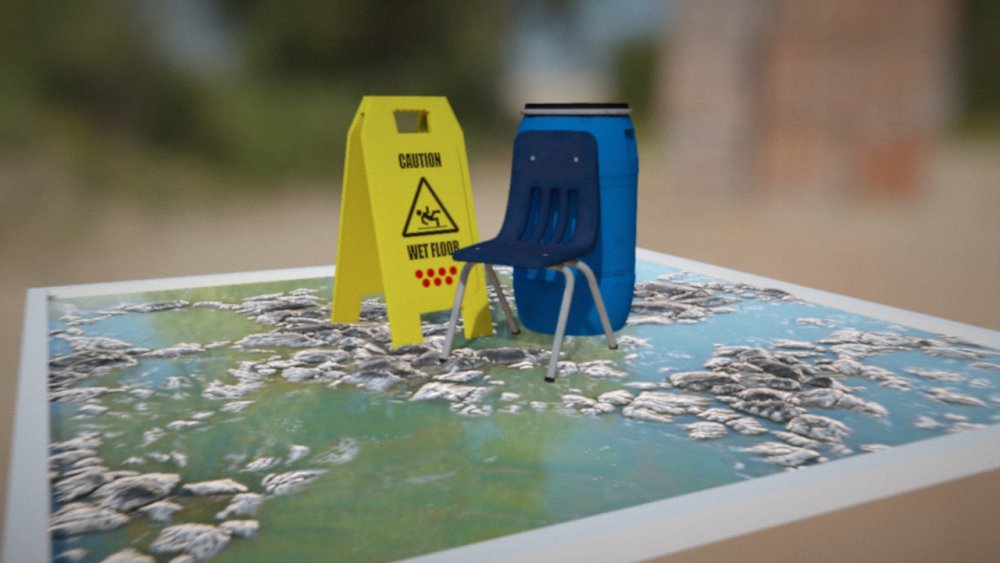
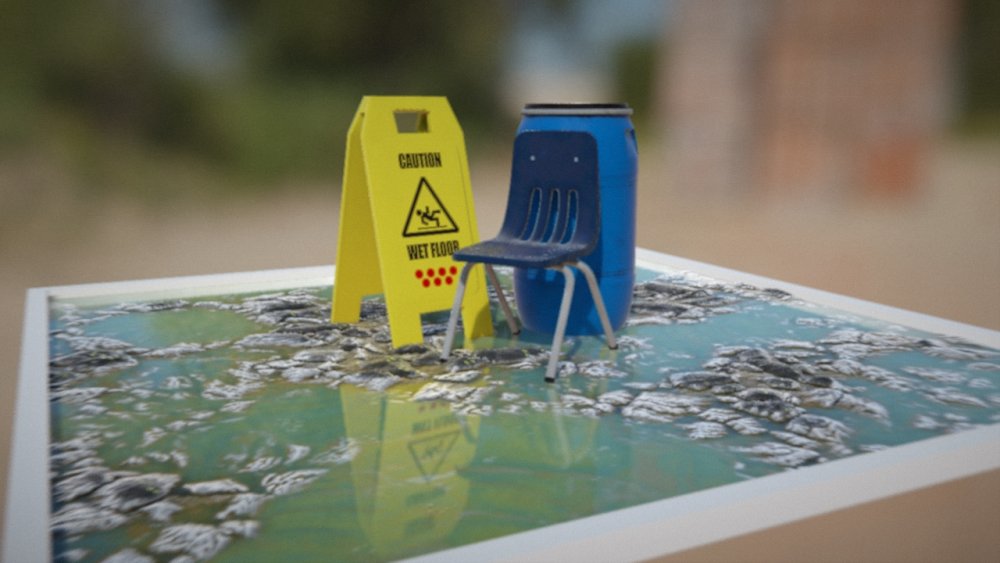
This technique analyses reflective surfaces and attempts to use information already in the scene to generate reflections. The main limitation is pretty obvious - it can only reflect what it can see in screenspace.
This means that with complicated surfaces or harsh view angles, parts of an object can be occluded from the reflective surface.
In the above image, notice the space underneath the chair - because the barrel is occluded, there isn’t any data to reflect and so a gap appears. Despite this, the technique can easily create realistic reflections on a surface, and handles varying roughness on surfaces, and is fairly flexible.
| Pros | Cons |
|---|---|
| Usually quite fast. Simple setup Reflects the scene Applies to any surface |
Can’t reflect anything not visible to the camera, view angle dependant Large rough surfaces can decrease performance significantly |
With SSR, you can improve performance by lowering the sample count, enabling animate noise, and adding temporal AA. This will average the samples over multiple frames, getting higher quality overall while reducing performance costs.
Probe Lighting #

Probe Lighting is a similar technique to Environment Mapping, except instead of using an imported image, multiple capture points are placed within the scene to capture the ambient lighting.
This is usually used for bounce lighting, but here I’m going to focus on it as a tool for reflections. One upside is that these can update continuously, so moving objects can be reflected in the scene, but getting enough detail for sharp reflections is often not viable with this technique.
It can work well when you have lots of small reflective objects in a scene with rough surfaces, but with larger reflective surfaces you’ll see the major issues, as the capture point can’t match the cameras perspective.
| Pros | Cons |
|---|---|
| Fast when non-dynamic. Reflects the scene. Great for rough surfaces |
Slow when dynamic Captures are spherical, so sharp reflections are often inaccurate |
Voxel Cone Lighting #
The Voxel Cone Lighting technique simplifies the scene into a voxel grid, and uses this to generate reflections.
These reflections aren’t great for sharp mirror reflections, as you’ll just see a blocky grid of voxels in place of your objects, but for rough surfaces you can get really nice reflections at relatively low performance costs. When used badly however, these can be more expensive than even raytraced reflections, so best to keep them isolated on key objects. Another tip is to use it with a point cache node, this can both optimise the voxel cones and increase the quality.
| Pros | Cons |
|---|---|
| Reflects the scene. Great for rough surfaces |
Slow when applied broadly blocky reflections on mirror surfaces Low angles can cut off reflections |
RT Mirror Reflections #
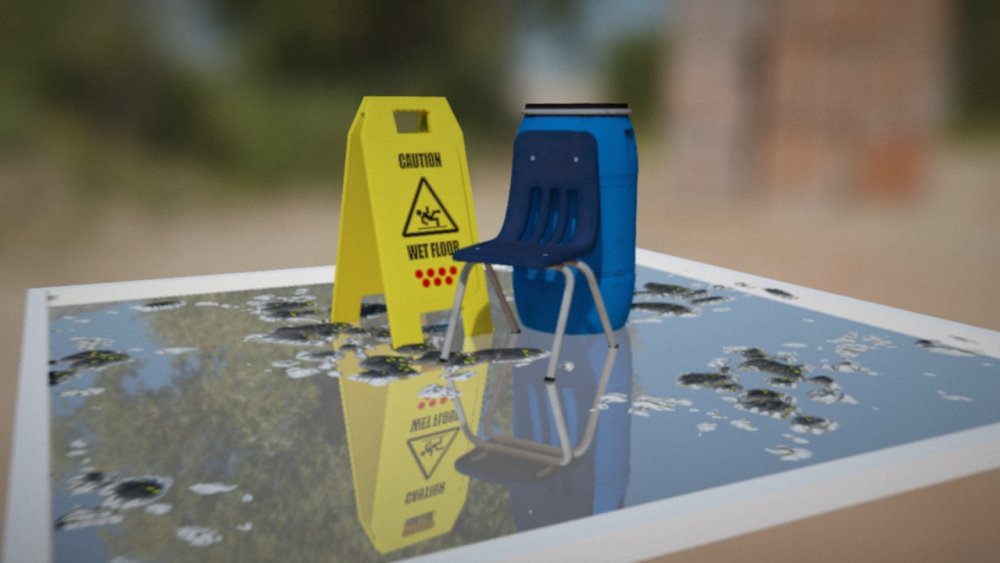
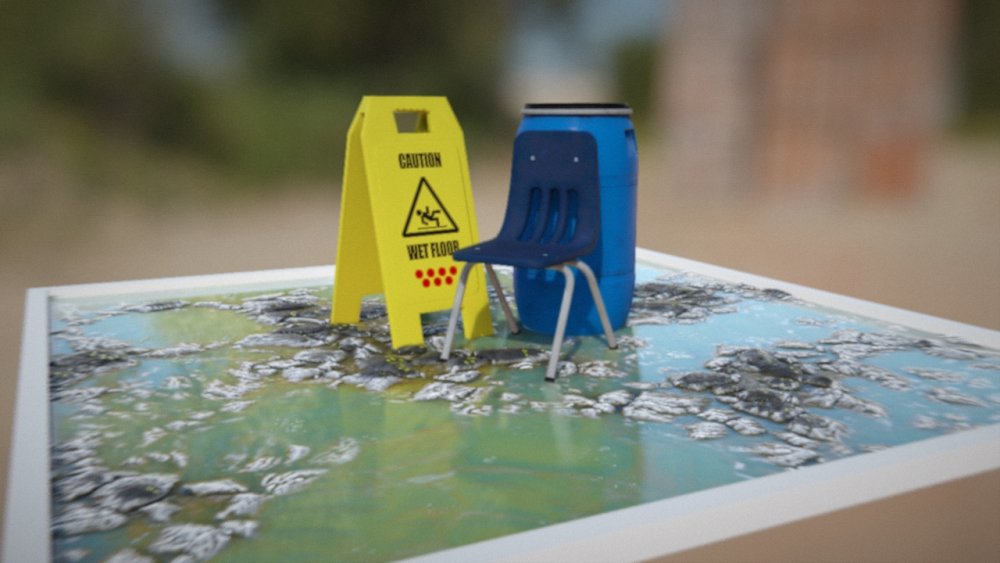
RT Mirror Reflections is probably the best real-time technique if you can manage it - this uses raytracing to generate the reflections, and can handle both occluded objects and rough surfaces. With complicated scenes with lots of geometry, performance can be problematic, so limiting the reflecting surfaces or reducing the geometry in the scene can improve performance significantly.
Some alpha blended surfaces won’t behave well with this technique either, so particles will need to be converted into geometry to be seen. Finally, The roughness effect is an approximation which has limitations with particularly rough surfaces or close camera positions.
This can be helped a little bit by increasing the quality, or increasing the blur scale, but you would probably want an alternative solution for those cases.
| Pros | Cons |
|---|---|
| Just as fast in most cases or faster than some of the options above Handles most kinds of advanced lighting effects, including alpha blended geometry |
Slow with scenes using lots of geometry Roughness is an approximation |
RT Multibounce / Pathtracer #
At this point, you will be either be heavily optimising the scene to just barely run at 30FPS, or you are from the future and laughing at the current technology we possess.
RT Multibounce / Pathtracer techniques uses raytracing just like the RT Mirror, but instead of doing a post blur on the roughness the rays randomly diverge when striking rough surfaces. These are the current best techniques available, Handling both occluded objects, advanced real-time lighting techniques, and multiple reflective surfaces (like mirror rooms).
In most cases where rough reflections are needed, multiple samples will need to be send out dramatically reducing performance. While they can be used in select real-time contexts, as of writing the offline world is where these are more appropriate.
| Pros | Cons |
|---|---|
| Great for all types of reflections Handles most types advanced lighting effects Multiple Bounces |
Too slow for real-time in most cases requires lots of samples to refine rough surfaces |
Summary #
So there’s lots of techniques, with varying limitations - but remember they aren’t all mutually exclusive. If you have an objects in the far distance, maybe disable RT Mirror on them and use Environment mapping instead.
Real-time graphics is a constant balancing act, finding the right effects for each scene, and applying different techniques until your scene meets that all important target FPS.
There isn’t one golden solution, each of these techniques has its place and when used appropriately, almost anything is achievable.