Live Video Input
Updated: 10 Feb 2026
Updated: 10 Feb 2026
Notch allows you to feed in a variety of different external video sources to be used within your project. This allows you to capture video feeds from equipment such as cameras and capture cards, but also video feeds from other softwares and digital sources.
Once you setup a video input source, you can use it in your Notch project just like any other video source. So you could apply Post-FX to it, you could use it as a source into a particle system or a field system, you could extract motion data from it with the Optical Flow node, you could apply it as a Material to geometry, the list is endless. The best way to think of a live video input (or any video in Notch) is to see it as a “texture”, so anywhere that a texture can be used and affected, so can a live video input.
When working with live video input there a couple of variables to consider to ensure optimal playback. Because you will be capturing an external source, it is important to understand the variables of that source, and importantly try to match it to the project you are working on.
The first thing to consider is the resolution of the capture feed. As a general rule with all video you want to use the most optimal resolution for the case in which it will be used. For example, if the video feed will only be displayed in a 500 x 500 pixel area of the screen, then bringing in a 4k video capture feed would be a waste of resources, so you may want to reduce the input resolution to HD or less depending on project.
For smooth playback of video you want to make sure that all video files and feeds are being played back at either the project frame rate, or a fraction of that frame rate. Notch will do a good job of playing back mismatched frame rate videos, but it cannot play a frame that doesn’t exist, so making sure the frame rates are consistent will insure you don’t get any dropped frames.
Additionally it is common that you will need your video input feeds to be 100% frame locked to Notch’s playback. For example if you are capturing a camera feed that will be processed and then output to a television broadcast, then you need to make sure that the camera feed, and the Notch output are totally locked and consistent. To do this effectively you need to make sure your playback machine is genlocked, and that Notch is being played back by a system that can be genlocked. The best way to do this is to export a block from your Notch project, and run it in a dedicated media server. Because of this it is advised to work with exposed Video Loaders, and then use the media server to do the video capture, and feed that into the video loaders. More info on this can be found here.
Depending on how you are using Notch will determine the best method for bringing in live video.
| Output Type | Method |
|---|---|
| Builder | Live video input should be setup using the “Video In / Capture” settings in Builder ( unless the final output will be a Notch Block used in a media server ) |
| Standalone | Live video input should be setup using the “Video In / Capture” settings in Builder. |
| Block In Media Server | All video should be fed into the Block from the media server via exposed Video Loaders. The media server should handle any video capture and then send it into the Block. |
The best way to understand when to setup live video capture in Notch, and when to set it up outside of Notch and feed it in, is to think about how much control you have over the capture settings. For example if you are just working in Builder, you have access to all of your capture settings directly in Builder. But if you export a Block, you can no longer access those capture setting, unless you open the project in Builder, change the settings, and then re-export. This is not a good way of working. It is much better to remove all capture settings from Notch, let the host media server do all the capture, and then feed that into the Notch Block via exposed Video Loader nodes. This way no matter what machine you are on or what capture source you want to use, you can easily select and manage it directly in the media server without having to go back into Builder.
Lets look at a basic setup where we use a webcam as an input, apply some effects to it, and then output that to the screen.
First you must setup the webcam as a video input.
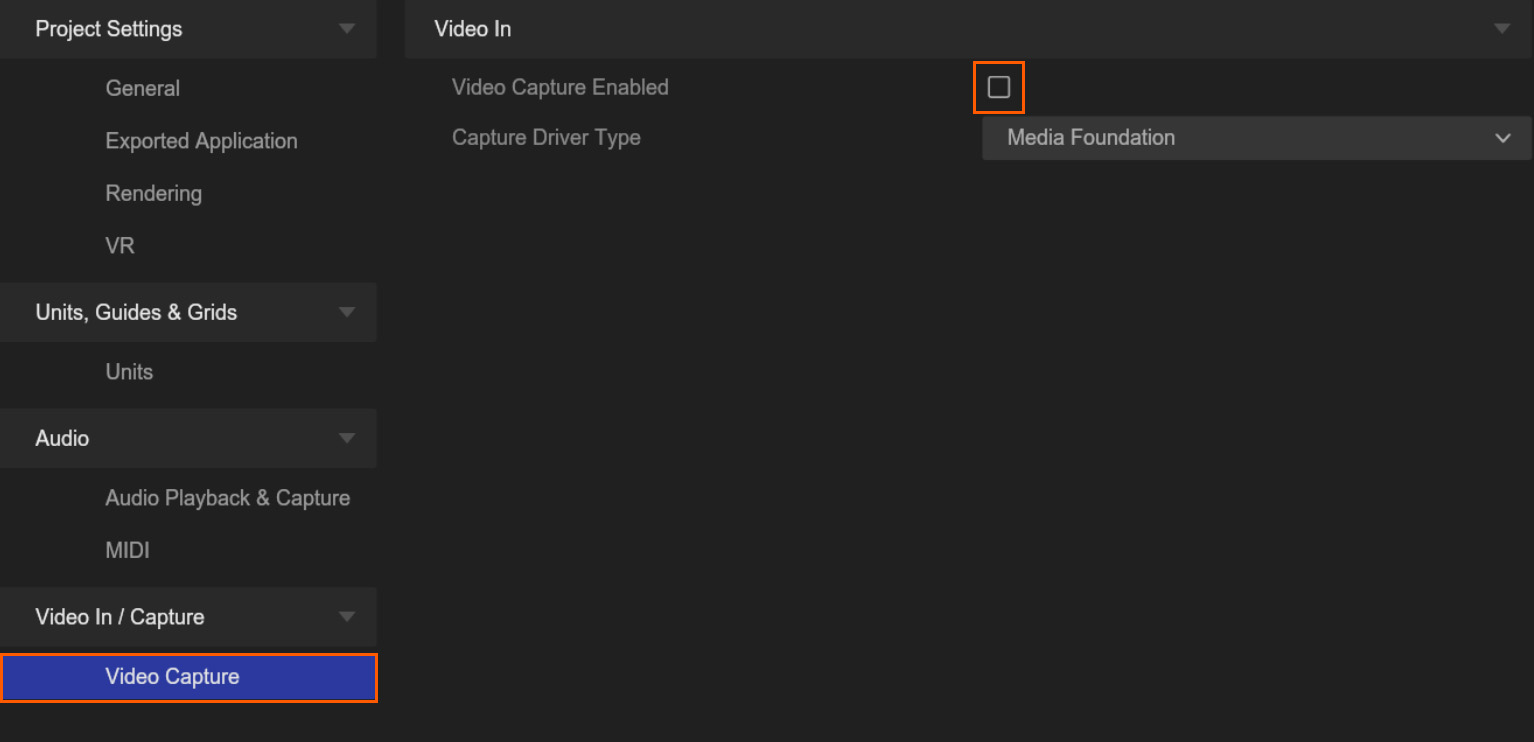
To do this, go to: Project -> Settings -> Video in / Capture.
Here is where you configure any live video input sources that you want to use in your project.
For this example select “Video Capture”. Video capture allows you bring in video from any device that uses either Directshow, or Media Foundation drivers. Typically this would be either webcams, or capture cards which could be used to feed in video from other cameras or video systems.
To activate video capture, click the “Video Capture Enabled” toggle.
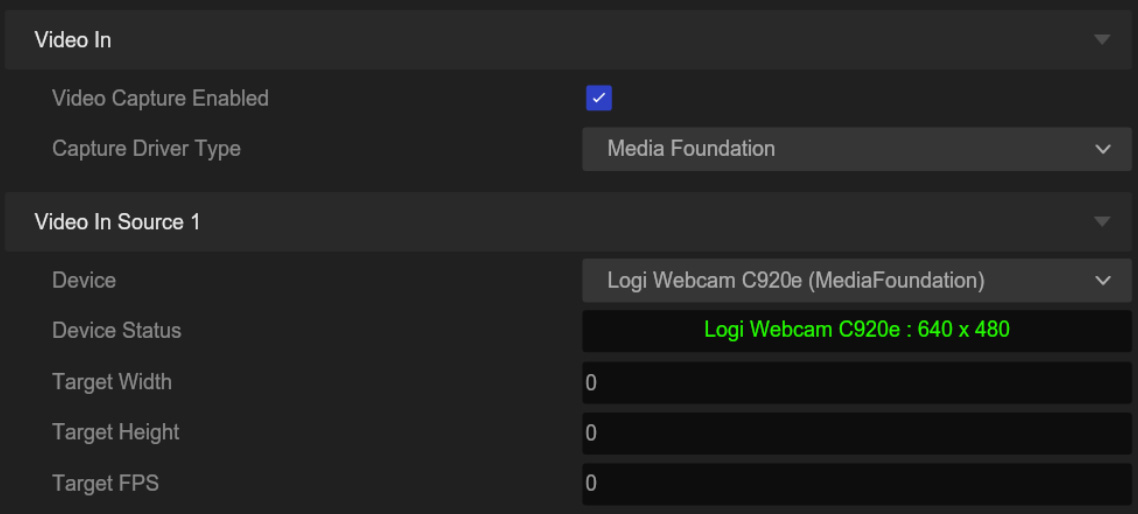
Now you can select the relevant “Capture Driver Type”, and then your “Device”, which in the case of this example is a usb webcam.
You will see that once the device is successfully connected, the “Status” will turn green. If the “Status” is not green then this means that the device is not connected correctly, or is possibly in use by another program.
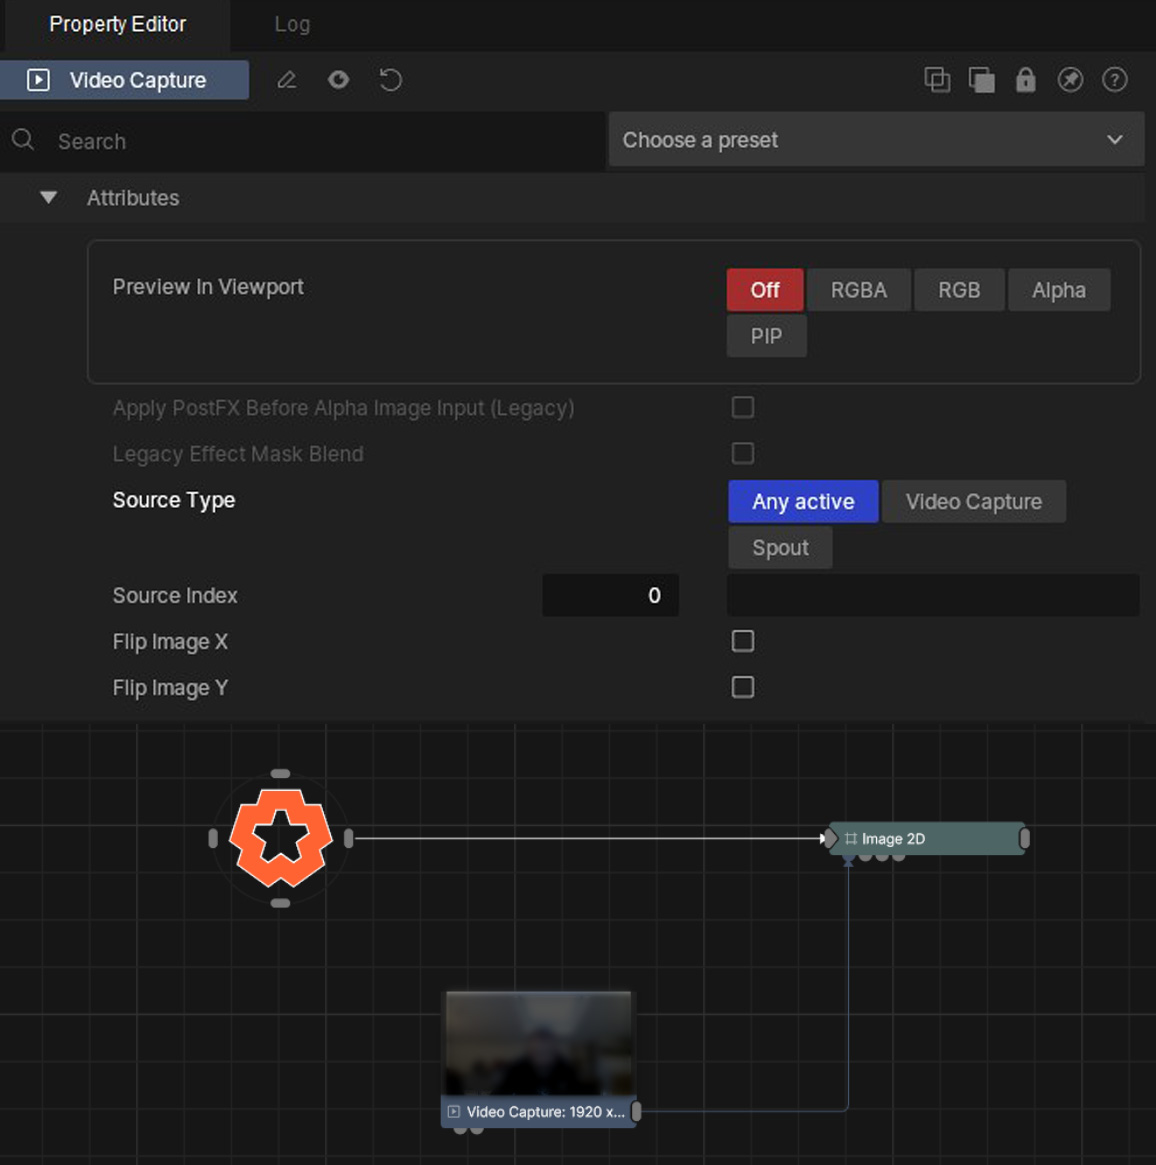
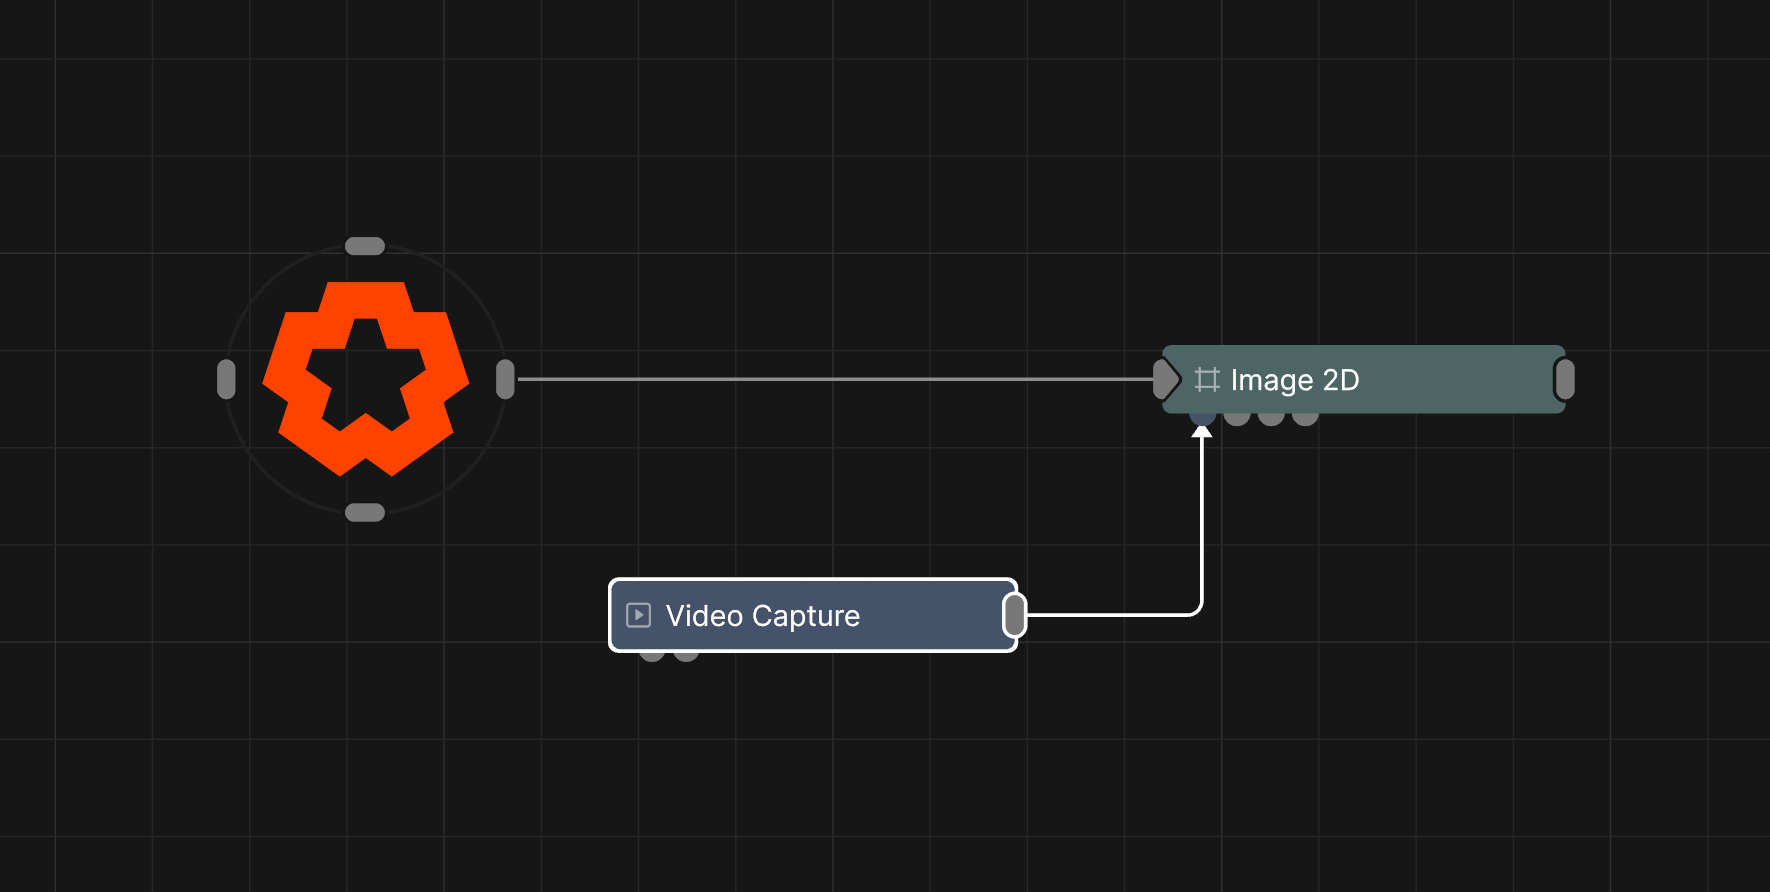
Once you have one or more video capture devices setup, can can now start to use them as sources in the Nodegraph. To do this you can use a Video Capture node. This node allows you to select one of the capture feeds that you set up in the project settings. As we have only added one capture device, we can leave the settings at default. This will select the capture device at index 0, which is the first slot in the settings, and also where we added the webcam as a device.
In this example I have also connected the Video Capture node to an Image 2D node, which will map the video feed to the viewport screen.
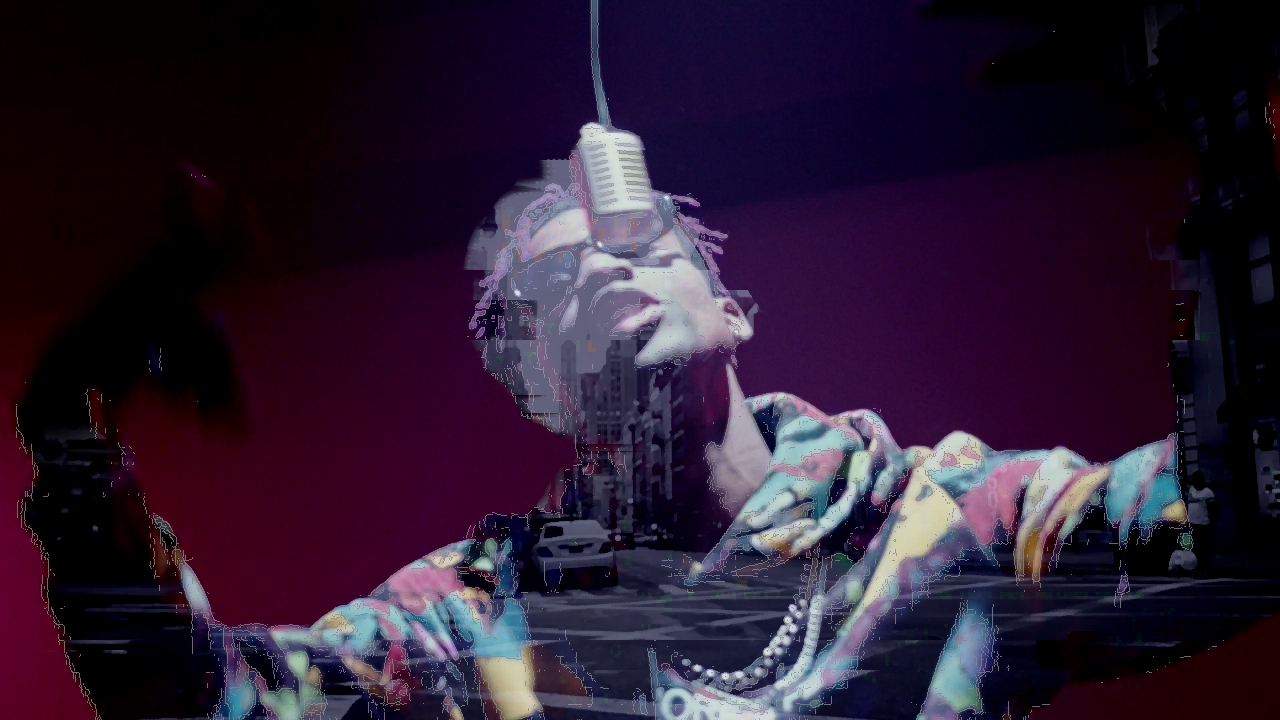
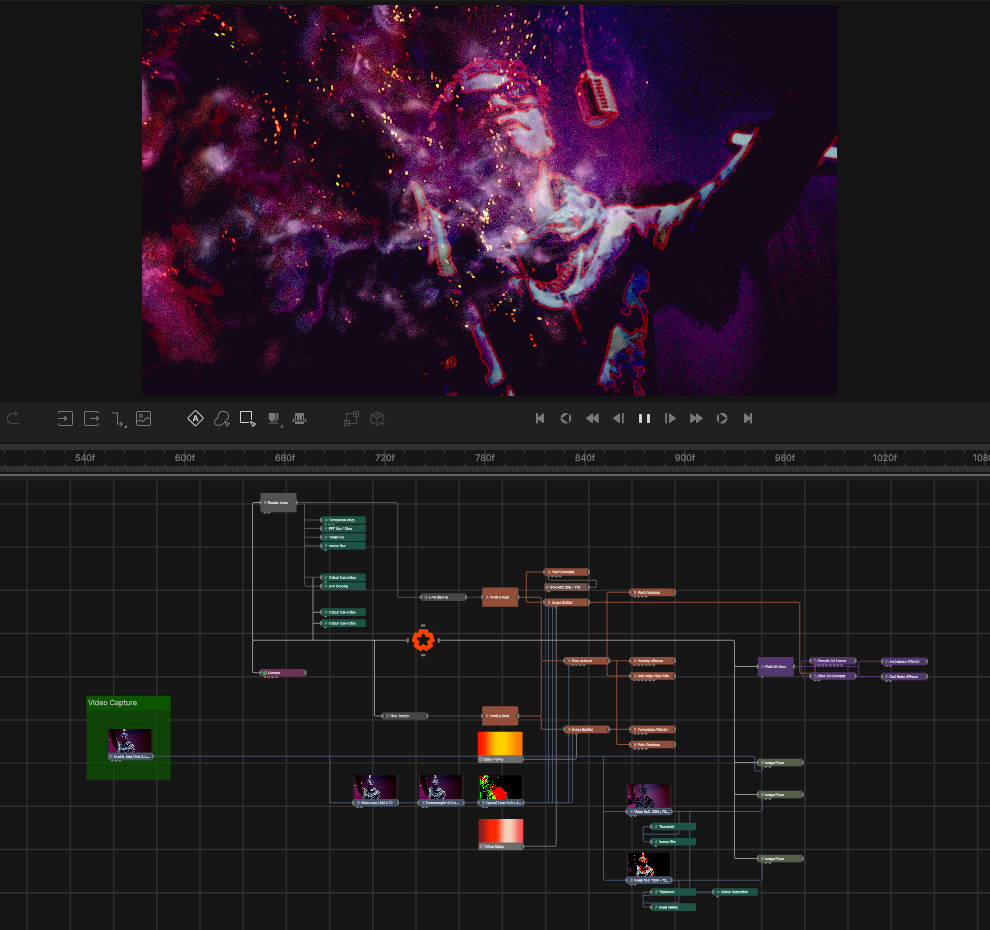
Now you have the basics of video capture set up, you can use the capture feed as a texture in many different ways inside Notch. Here is an example that uses the feed with a mixture of Post-FX, Particles and Fields to create a live IMAG effect.
NDI (Network Device Interface) is a video-over-IP protocol developed by NewTek that lets you transmit high-quality, low-latency video, audio, and metadata over a standard IP network (like Ethernet or Wi-Fi). Instead of running dedicated video cables between devices, NDI sends video as data packets across your existing network infrastructure.
NDI is commonly used in live video production and broadcasting, especially where flexibility and scalability matter. Typical use cases include:
With NDI, cameras, computers, switchers, graphics systems, and replay tools can all see and exchange video with each other on the same network.

Learn more about using NDI in Notch here.
Spout is a real-time video-sharing protocol for Windows that lets applications pass video frames directly to each other on the same machine using the GPU. Instead of encoding video, sending it over a network, and decoding it again, Spout shares textures straight from one app’s graphics memory to another’s.
It’s allows fast, low-latency video between apps on one computer.
Typical uses include:
Learn more about using Spout in Notch here.