Using The Render Node
Updated: 28 Mar 2026
Updated: 28 Mar 2026
The Render Node is a new application designed to render videos and stills from your Notch project files.
This standalone tool gives you the ability to open .dfx projects and render them on any machine, in a simplified view. When used alongside the Render Queue, this can be a powerful tool to automatically send large quantities of compositions through to render in sequence.
You can open the Render Node App from your Notch install directory, typically "C:\Program Files\Notch 1.0\NotchRenderNode.exe". You can also search for it in the Windows Start Menu, just look for “Notch Render Node”.
You can use the Notch Render Node (App & CLI) with VFX or RFX licenses.
Render Node licenses for spare machines or render farms will be available at a later date.
Render queue items saved in a DFX will load into the Render Node app automatically. See using the Render Queue for how to add items to the render queue in Notch.
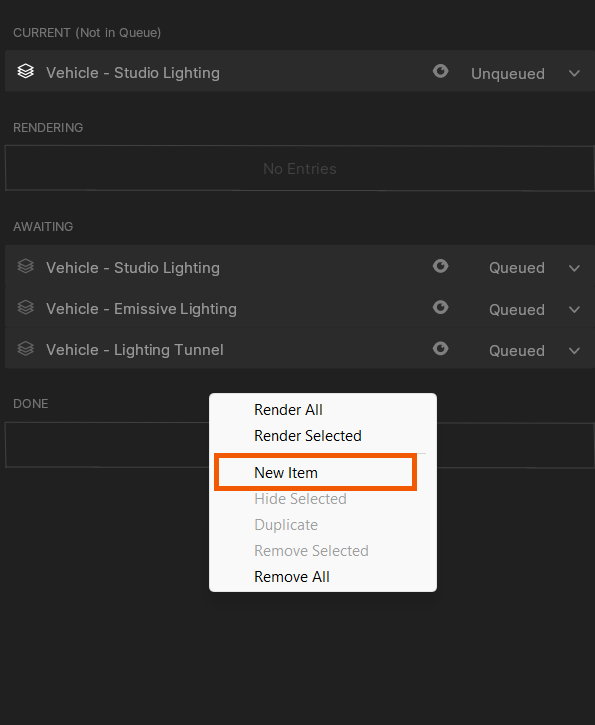
New Items can be added to the Render Nodes Render Queue by right clicking in the Render Queue panel and selecting “New Item.”
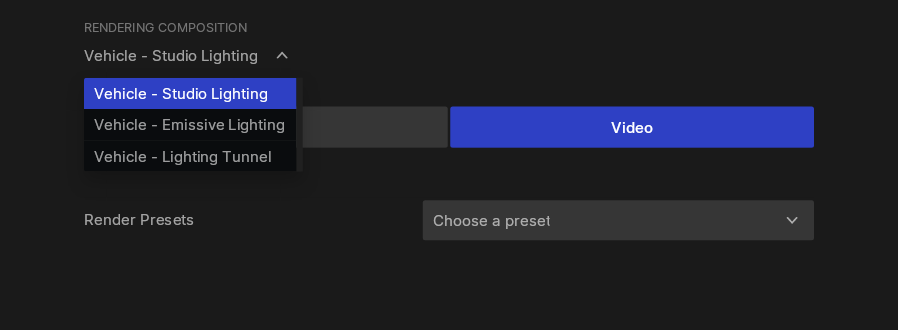
This will create a copy of your first composition. From here, you can then select the intended composition via the dropdown in the Render Panel.
These properties control how the project will be rendered to disk.
| Label | Description |
|---|---|
| Resolution | The pixel Width and Height of the render |
| Frame Rate | The number of frames displayed per second. Video only. |
| Common Formats | Quickly access commonly used resolution standards. |
| Duration | How long to render for, measured in Minutes : Seconds : Hours. Some effects will need some time to build up, so either allow for extra time at the start or add a preroll time. |
| Preroll Time | Pre-render a time frame before the initial start time. This can help some effects which are dependant on previous frames, and allow lighting to pre-calculate for the first frame. |
| File Name | Set the file name the render will be saved with. |
| Folder | Set the folder the render will be saved to. |
| Version Tag | Automatically add a suffix to the end of the file name, to help with versioning and prevent files overwriting. - None, No tag will be added. - Numeric, A simple numerical count is added, which checks for previous files and increments for each re-render. - Date/Time, The current date and time of the render at initial render time are saved in the file name. |
| Format | The container the video will be rendered with. |
| Codec | The codec the video will be rendered with. Video Only. |
| Quality | Adjust the Quality settings for the codec. |
| Refine Passes | Alter the refinement passes used to render. Defaults to that of the active renderer in the composition. |
| Output Colour Space | Set the output colour space for the render. For more, see our page on Colour Management. |
| Output Colour Channels | Set whether alpha is rendered or not. |
| <—> |
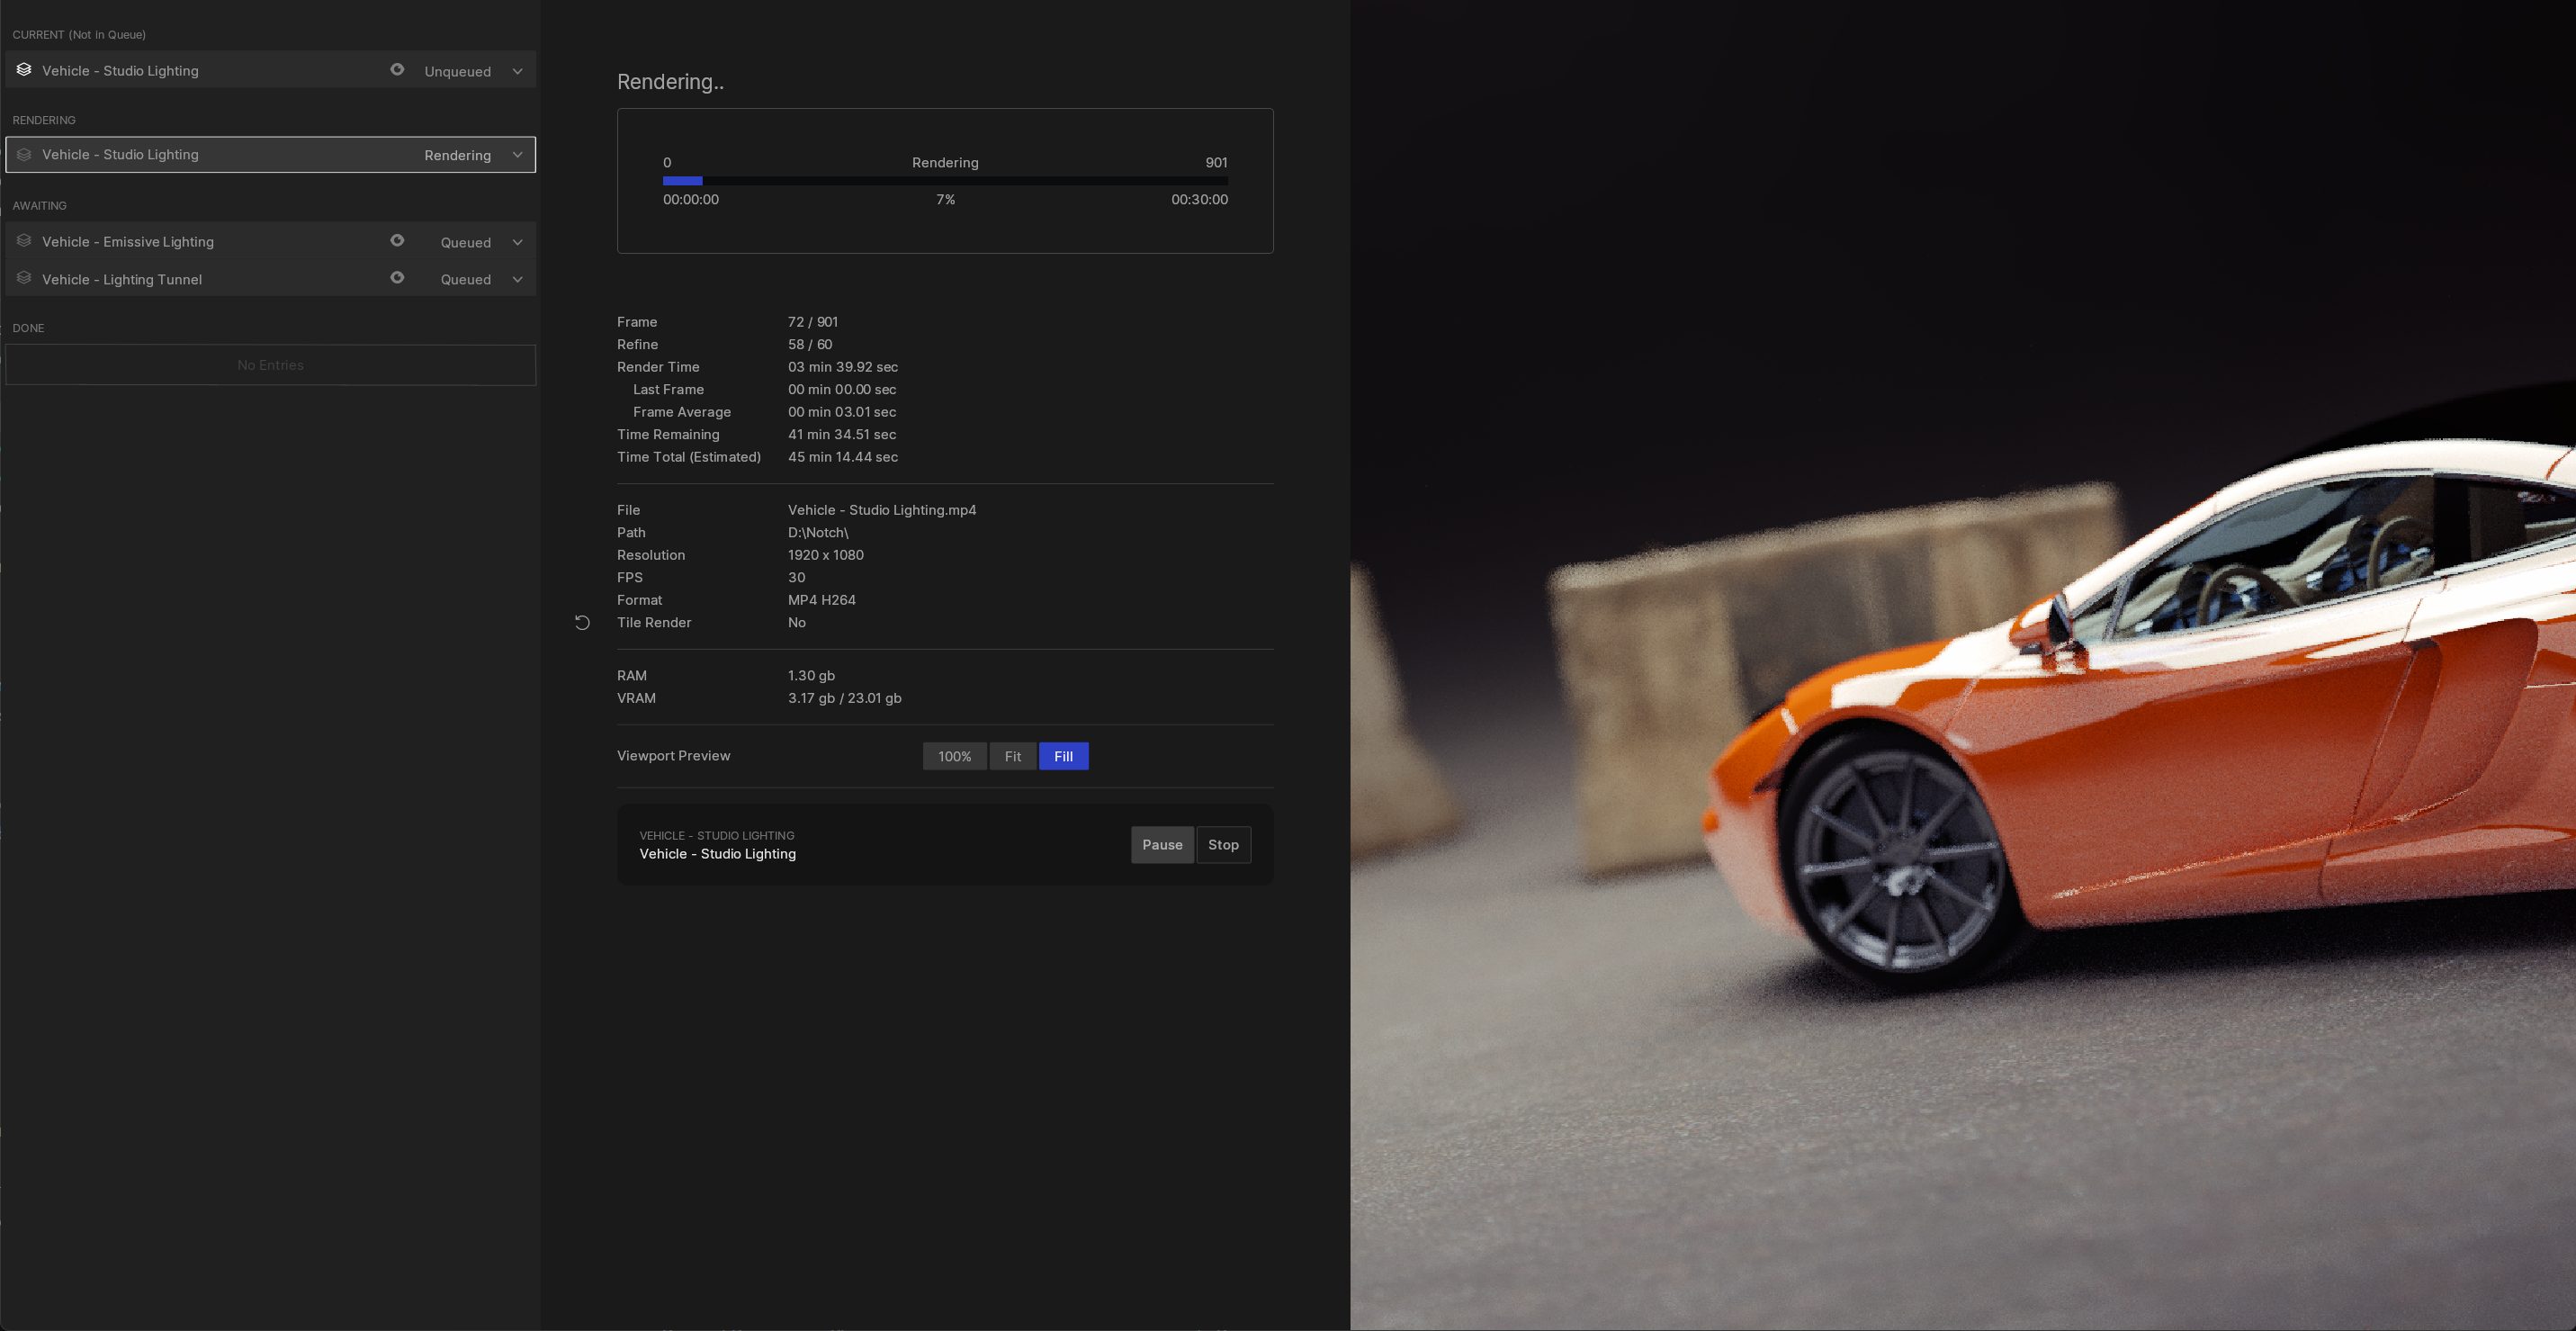
The right hand side panel of the render window will show the output of your renderer as it renders.
You can use macros to create unique output filenames. Each macro must be prefixed and postfixed with a % sign.
Notch supports the following variations:
| Macro | Description |
|---|---|
%YYYYMMDD% |
YearMonthDay. |
%DDMMYYYY% |
DayMonthYear. |
%MMDDYYYY% |
MonthDayYear. |
%DATE% |
Equivalent to the DDMMYYYY macro. |
%TIME% |
The current system clock time. |
%HHMM% |
HoursMinutes. |
%HH% |
Hours. |
%HHMMSS% |
HoursMinutesSeconds. |
%V% |
Single-digit version id. |
%VV% |
Double-digit version id. |
%VVV% |
Triple-digit version id. |
%VERSION% |
Four-digit version id. |
%LAYERNAME% |
The name of the layer. |
%CAMERANAME% |
The name of the camera. |
For example: filename_%YYYYMMDD%_export_%VVVV%.mov would translate to filename_20200125_export_0001.mov when saved to disk.
For theV,VV,VVV, orVERSIONmacros, if a file with the same name already exists the id is incremented by 1 until a free filename is found.