Importing Videos
Updated: 20 Jan 2026
Updated: 20 Jan 2026
Notch supports a variety of different image formats and video codecs. It is important to consider and select the relevant format/codec for your video/image files before importing them, considering variables such as the quality, size and performance of each.
Any imported video/image must be of one of the following formats:
Notch natively supports the following video codecs:
Making sure the framerate of your imported video matches the desired framerate of your project (and other video files) will ensure the best possible video playback. Mismatched framerates can lead to inconsistent playback between videos and may result in visible skipping.
Notch is smart and will handle mismatched framerate video files as efficiently as possible, but for the best and smoothest playback it is advisable to keep all files the same playback rate.
While resolution can be managed to some extent inside Notch, it is important to consider the impact that the resolution of any imported videos or textures could have on the overall performance and memory usage of a project.
Importing files at the correct resolution for their use will maximise performance and memory overhead.
For example, using a 8000 x 8000 pixel video file on an object that only occupies a 100 x 100 pixel space on the screen would be a very unnecessary and inefficient use of a large texture. It would take up more memory, and require more of the total frame time to process vs a smaller texture.
Importing video and image files in Notch is achieved by using the Resource Browser.
There are three ways to import video/image files in to Notch using the Resource Browser:
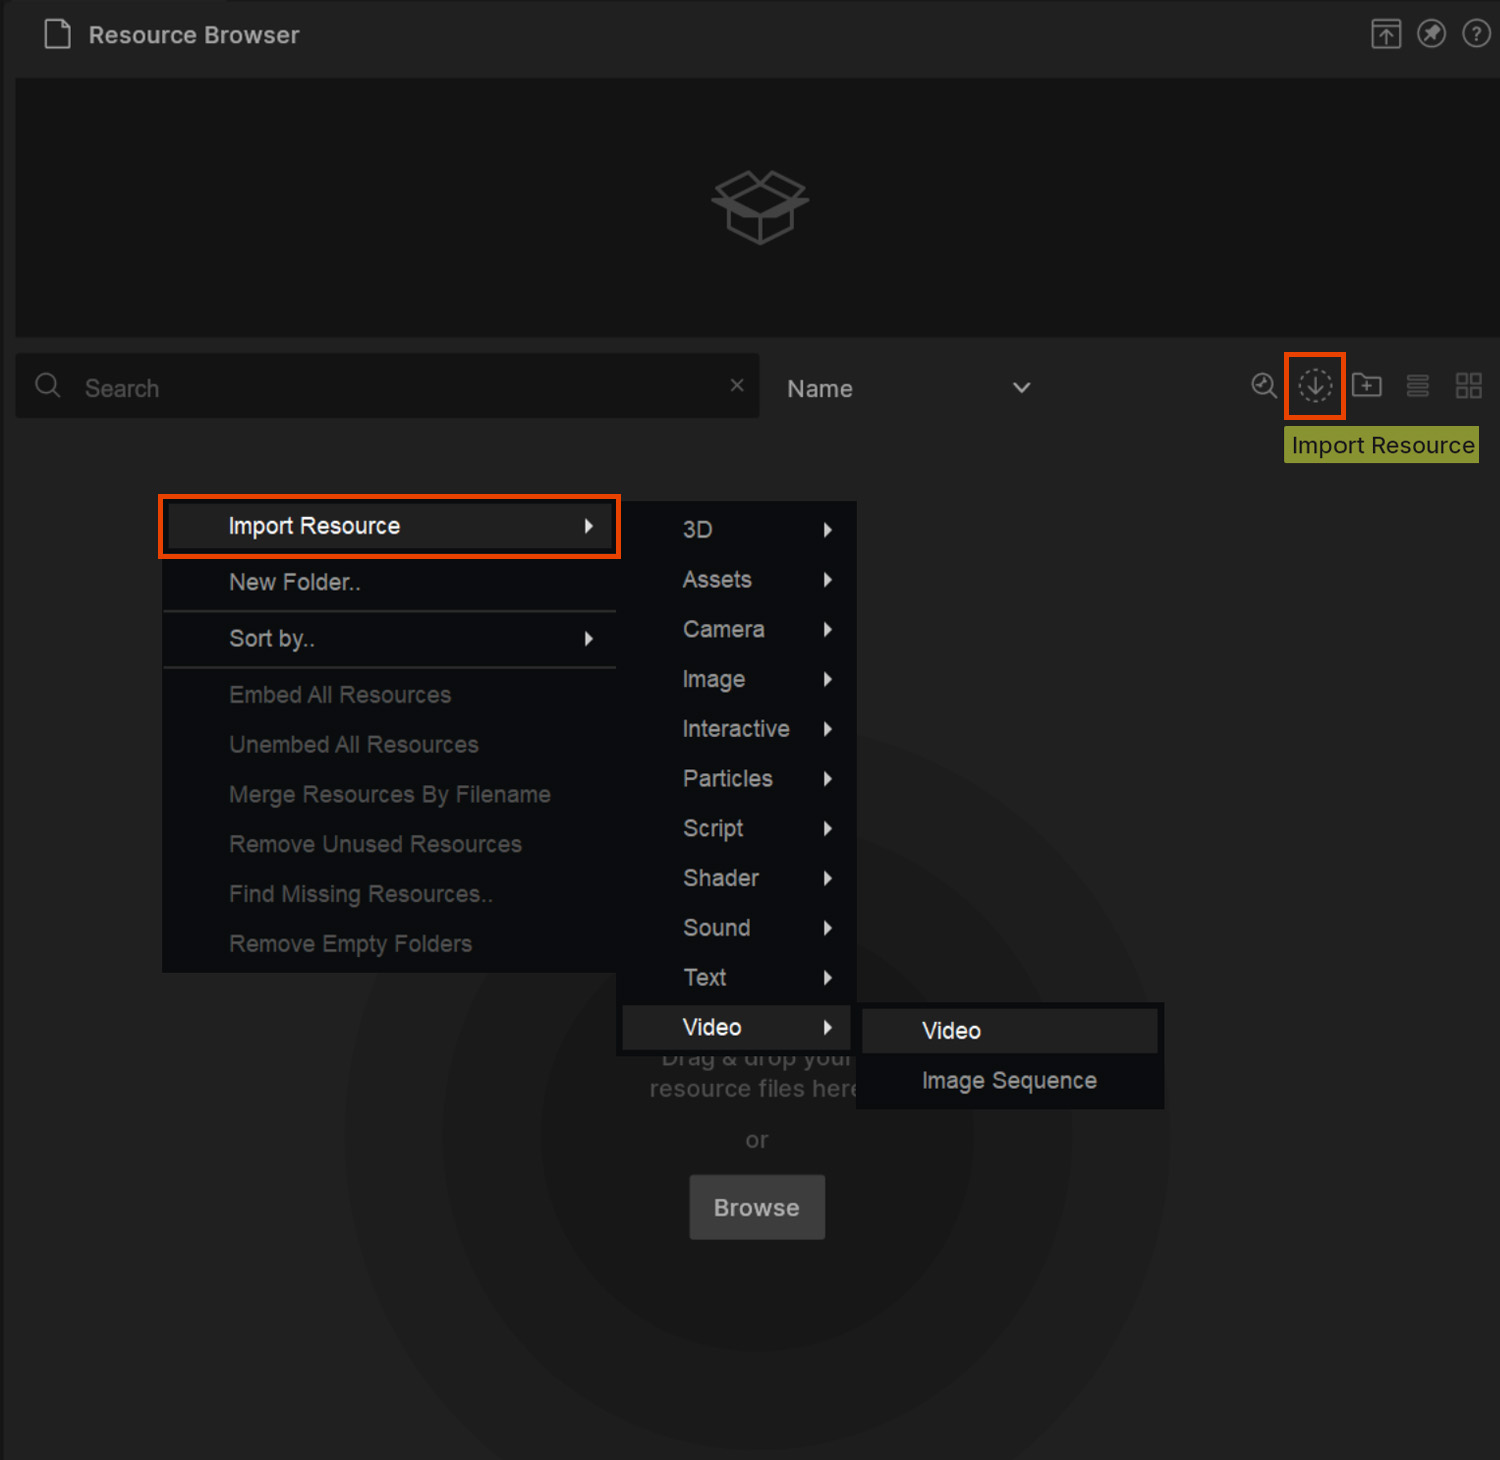
Image sequences can also be imported into Notch using the Resource Browser.
As image sequences are comprised of multiple files, it is necessary to use the right click -> Import Resource method only:
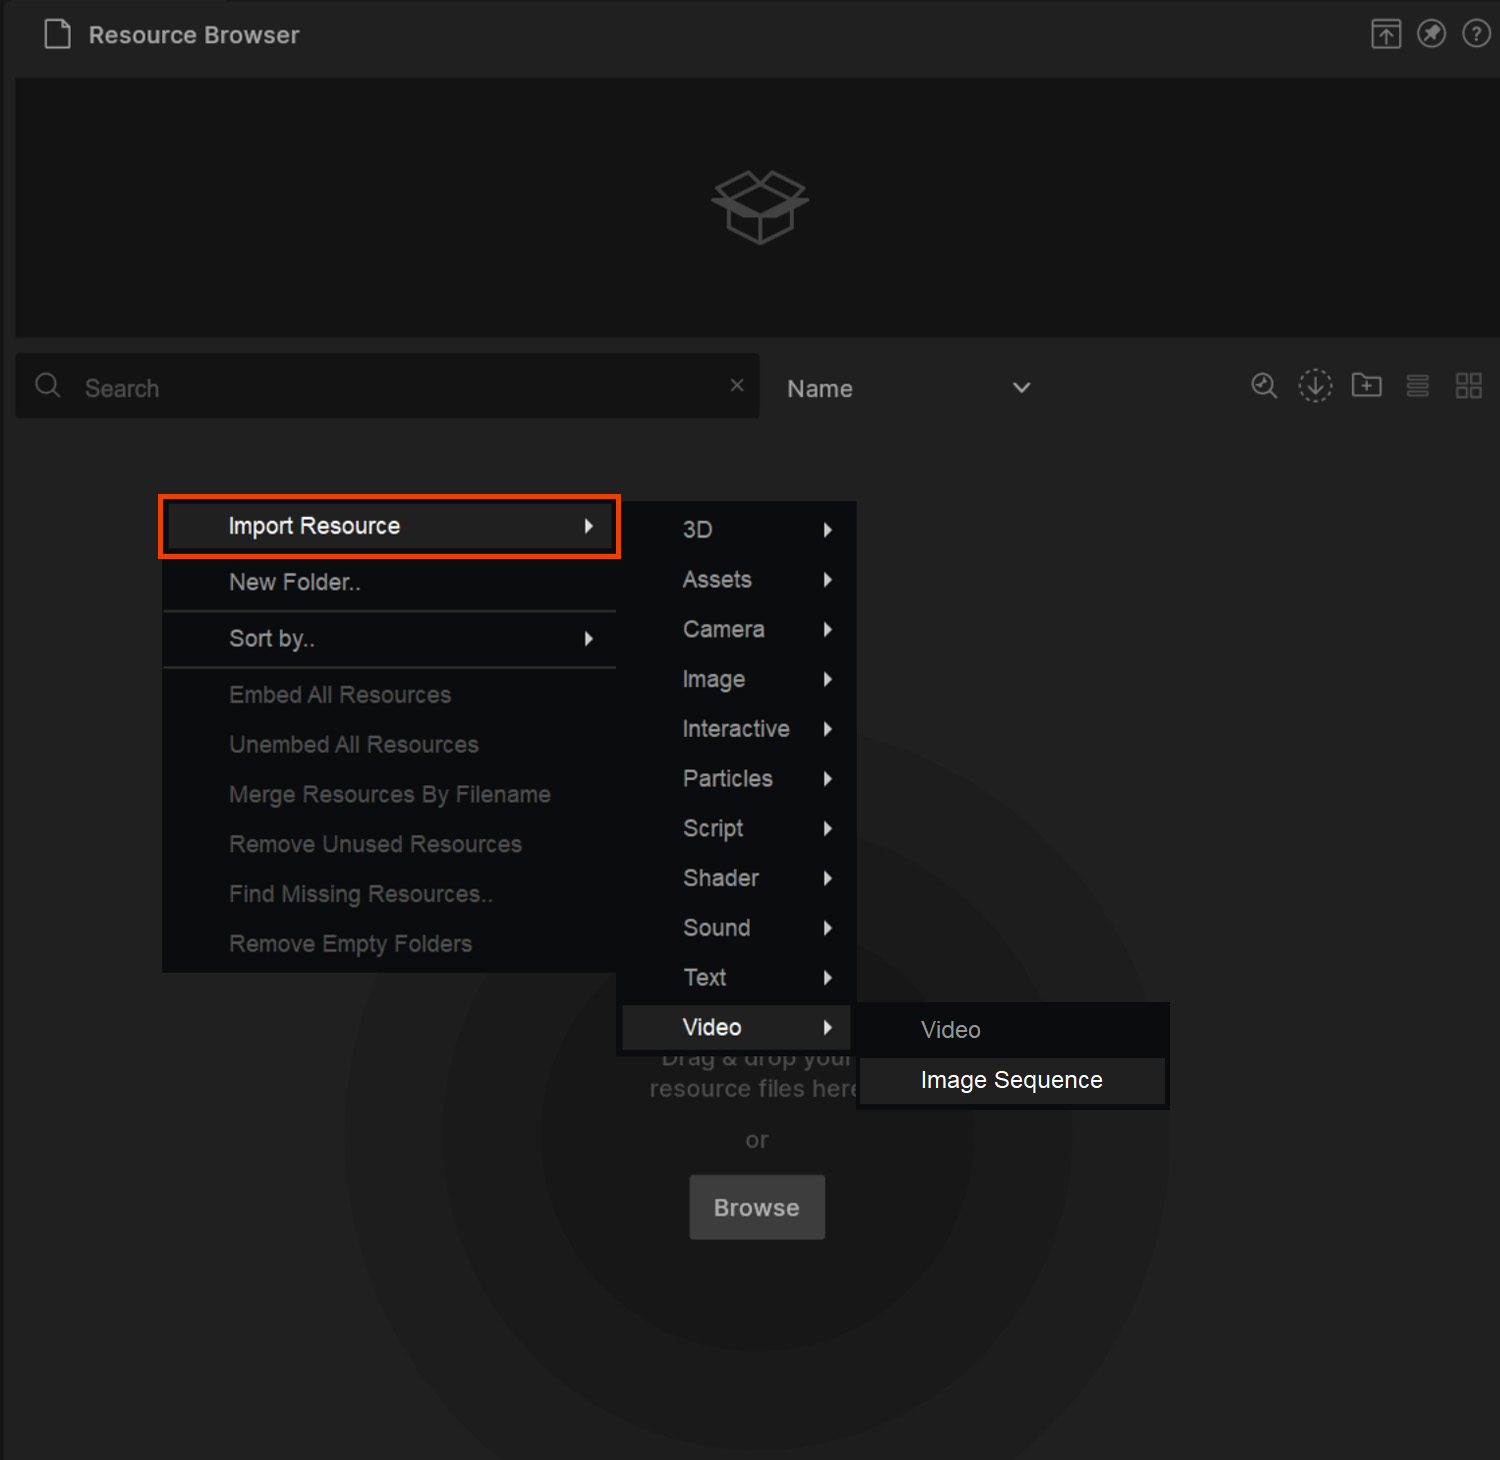
Image sequences must be named correctly to be recognised as a sequence and not a single image. Each file in the sequence must share the same name, but have a unique number on the end. Files will be loaded into the sequence in numeric order.
Example naming convention:
File_name_0000.png
File_name_0001.png
File_name_0002.png
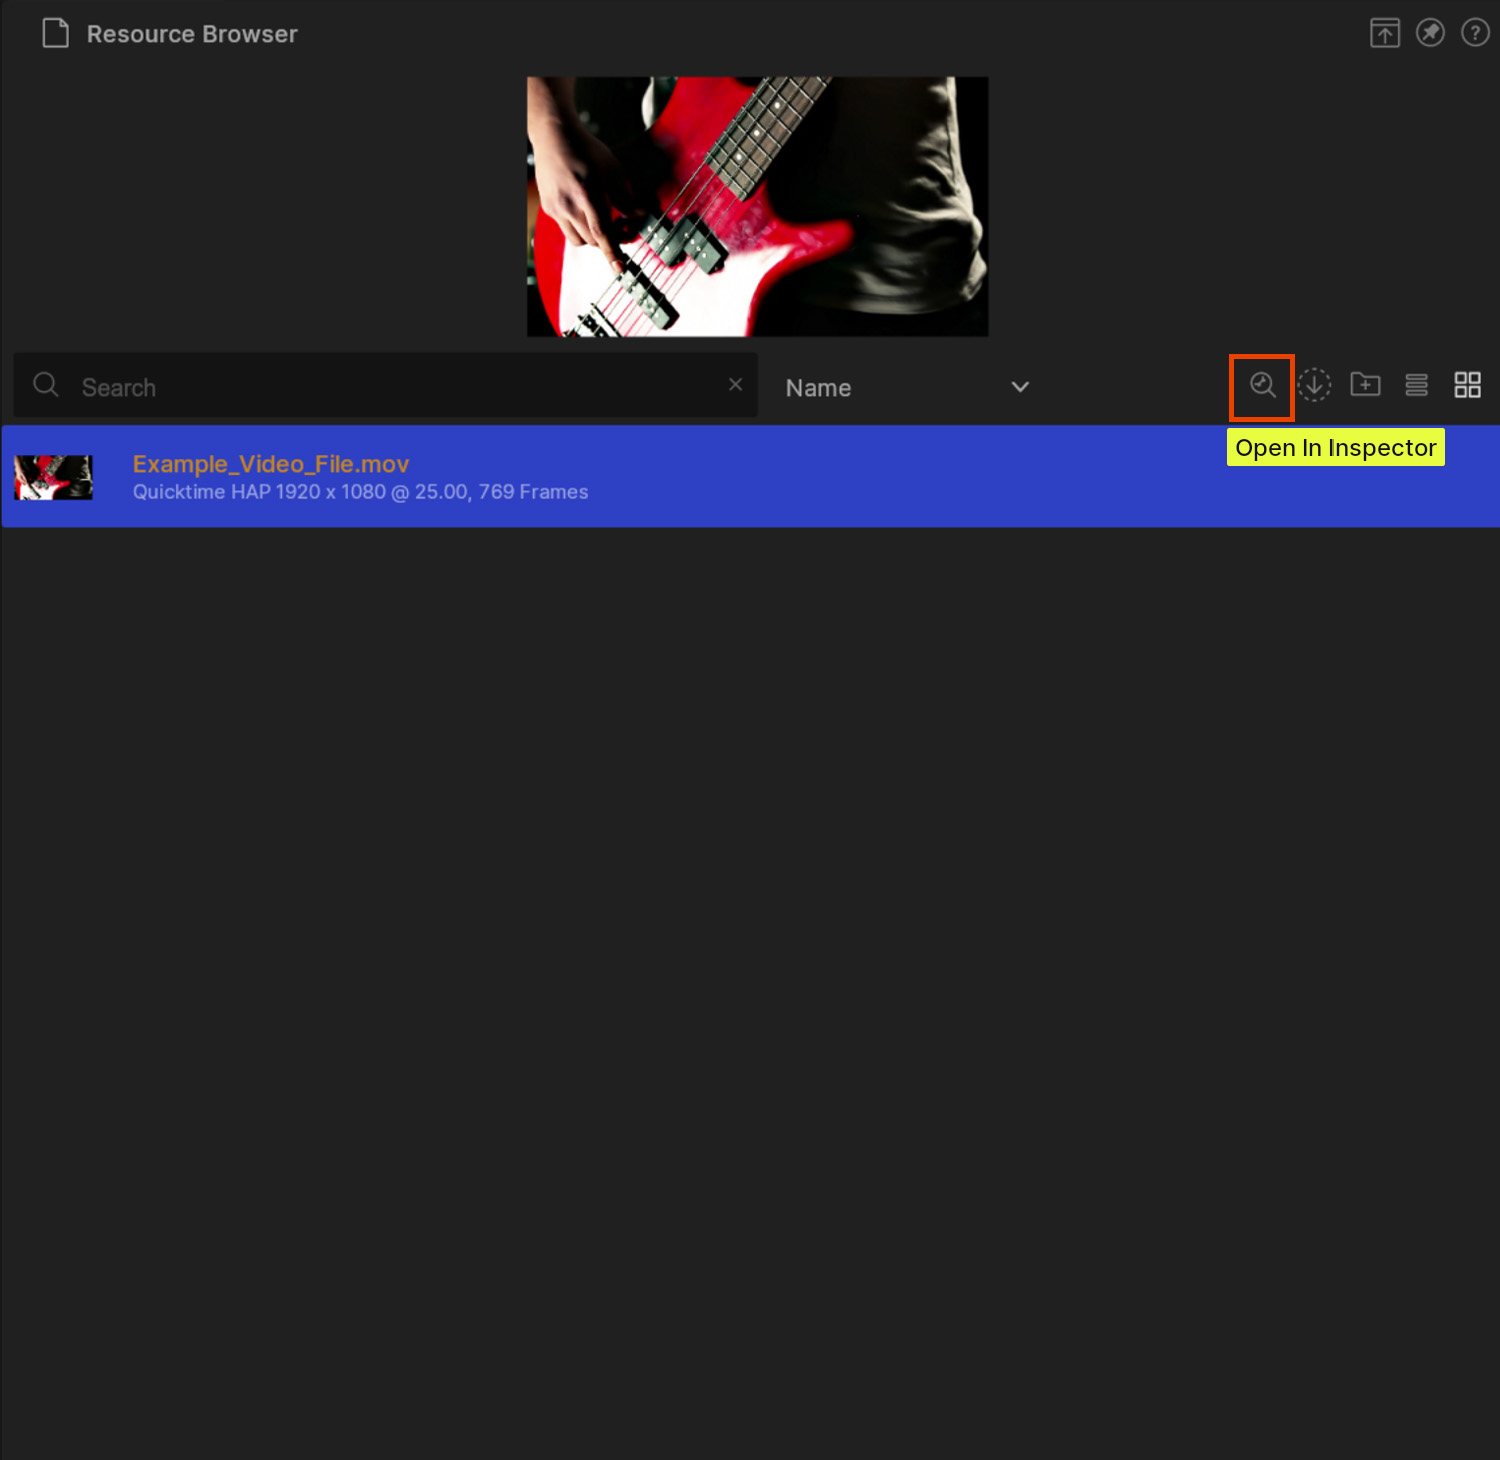
Once you have imported your video/image file, you can select it in the Resource Browser by simplify clicking on it. You will see a preview in the the top section of the Resource Browser.
You can also see some basic information about it in its slot in the Resource Browser.
For more detailed information about a file, you can use the Inspector.
To open the Inspector, click on the file, and then hit the “Open In Inspector” button.
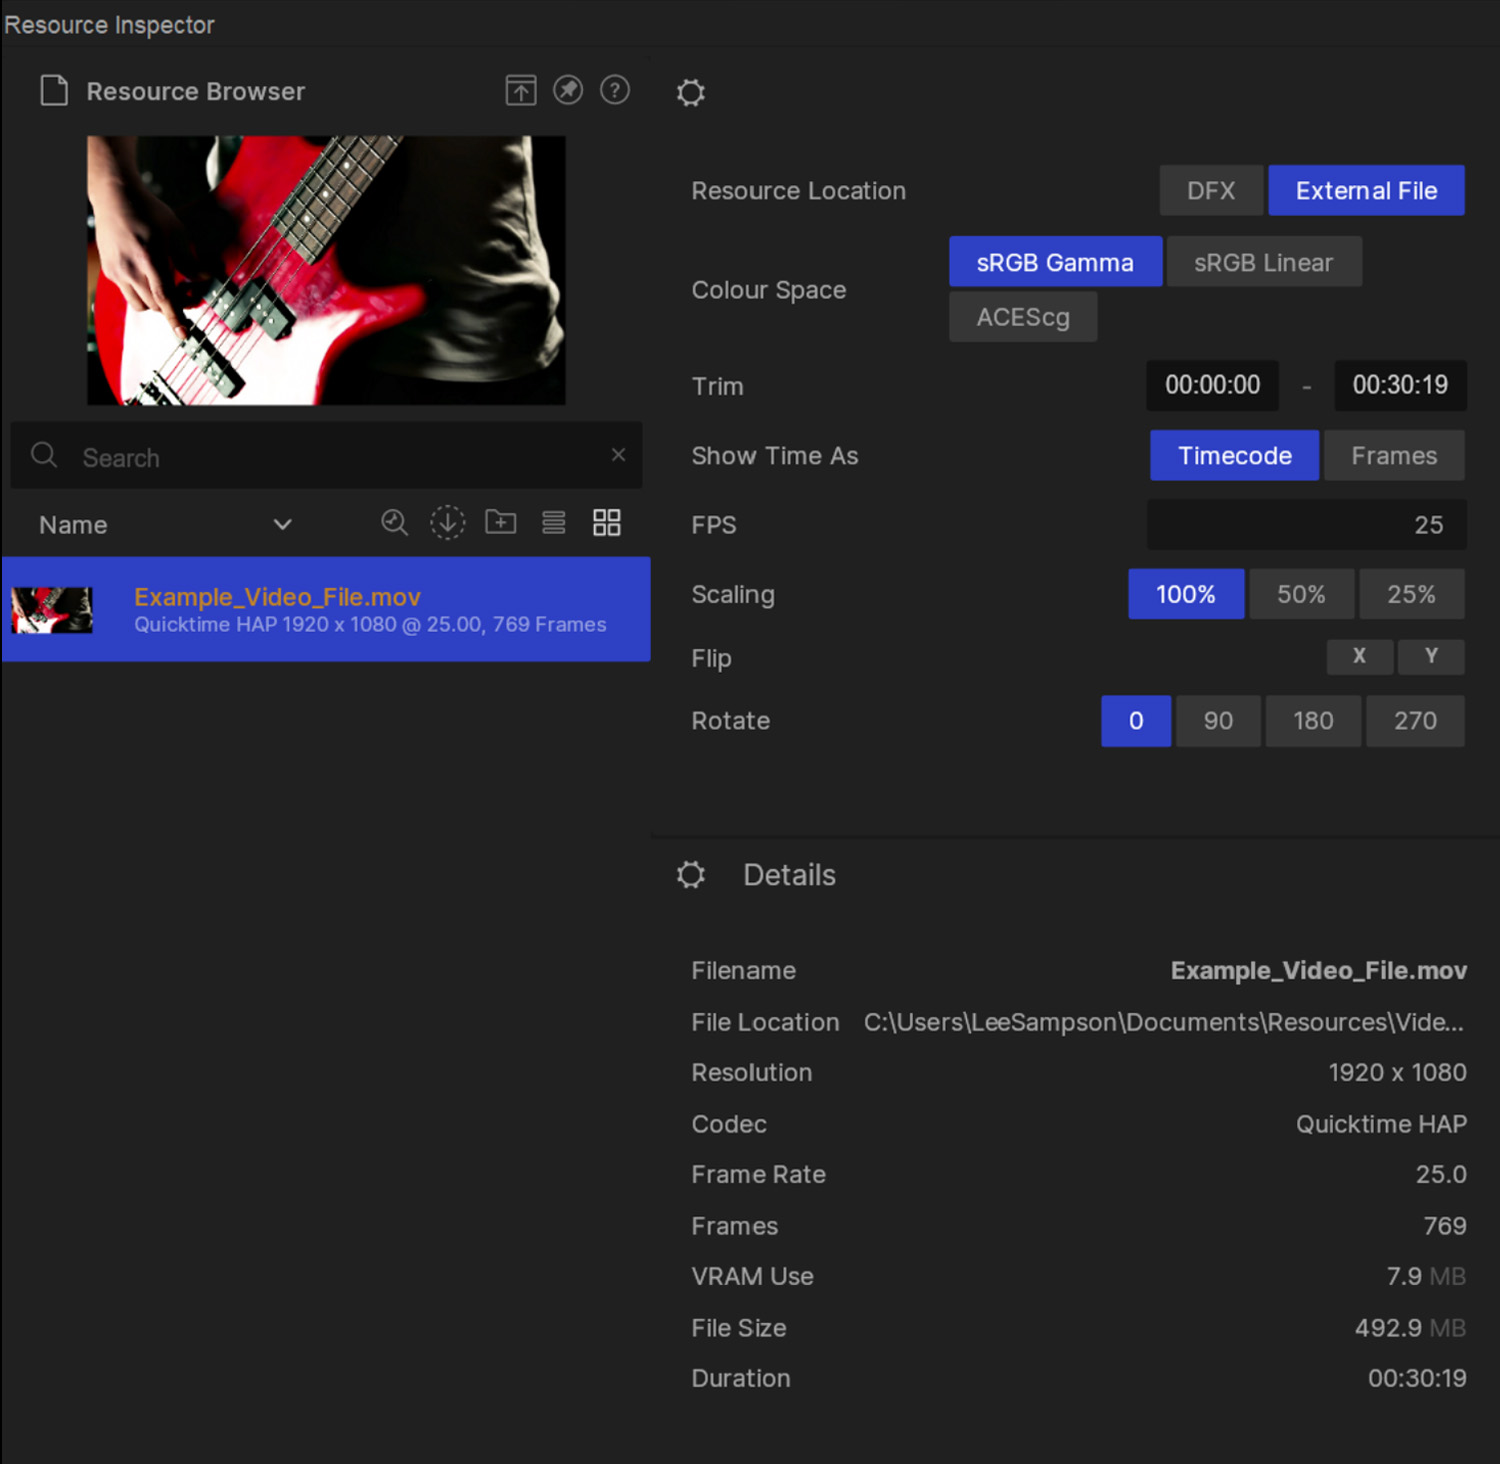
Inspecting the details of video and image files in Notch is achieved by using the Inspector. Here you can view file specific meta data as well as make some basic adjustments to the file.
The Inspector comprises of:
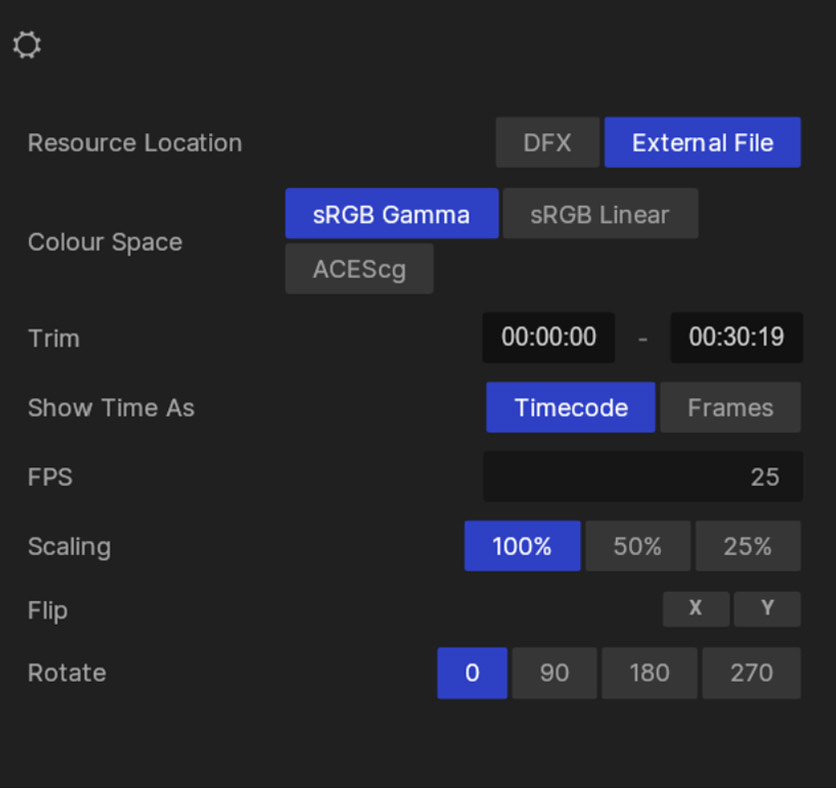
| Parameter | Detail |
|---|---|
| Resource Location | Whether to embed the file in the DFX or to look outside of Notch for the file. |
| Colour Space | Adjust the colour space of the file. |
| Trim | Adjust the start and end time of the file. This can also be done in the preview viewport. |
| Show Time As | Set the time to show in either Frames, or Timecode (Minutes:Seconds:Frames) |
| FPS | Set the playback frame rate of the video. |
| Scaling | Set the scaling percentage of the video. Reduce the resolution of the file to 50% or 25%. |
| Flip | Flip the video file along the X or Y axis. |
| Rotate | Rotate the file in increments of 90 degrees. |
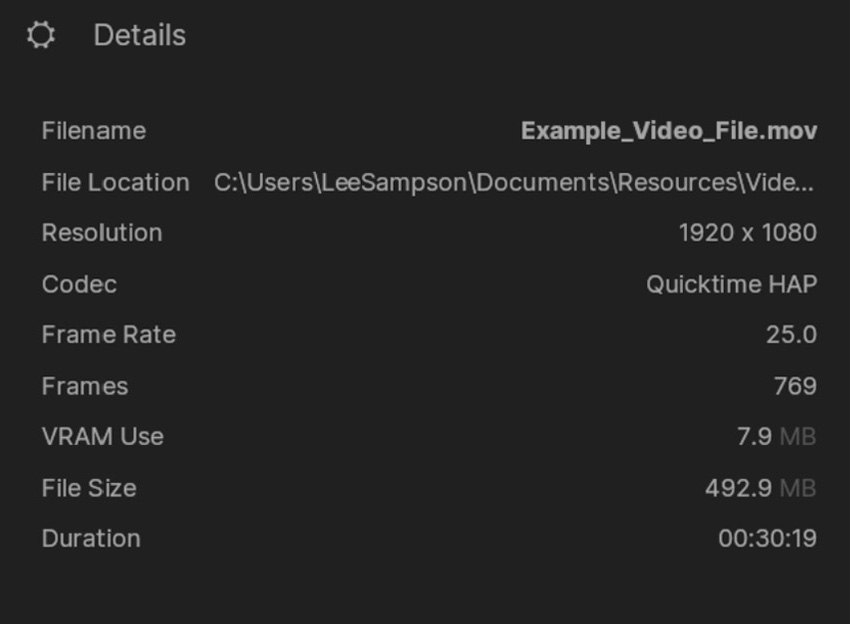
| Parameter | Detail |
|---|---|
| Filename | The name of the file. |
| File Location | The filepath of the file. |
| Resolution | The width and height resolution of the file. |
| Codec | The codec of the file |
| Frame Rate | The frame rate (frames per second) of the file. |
| Frames | The length of the file in frames. |
| VRAM Use | How much VRAM (GPU memory) the file takes up. |
| File Size | The size of the source file. |
| Duration | The length of the file in Minutes:Seconds:Frames |