Keeping Projects Tidy
Updated: 29 Jan 2026
Updated: 29 Jan 2026
Nodegraphs allow you to work really quickly in designing your looks, but it does pay to spend some time and attention to keep your projects tidy and easily readable. This is especially worthwhile when working in one project between teams of people or when re-opening an old project. Little details to keep things understandable can help make things much quicker in time.
Notch contains several useful tools for keeping projects tidy, well documented and faster to work with. This section of the manual gives an overview of some of these tools and functions
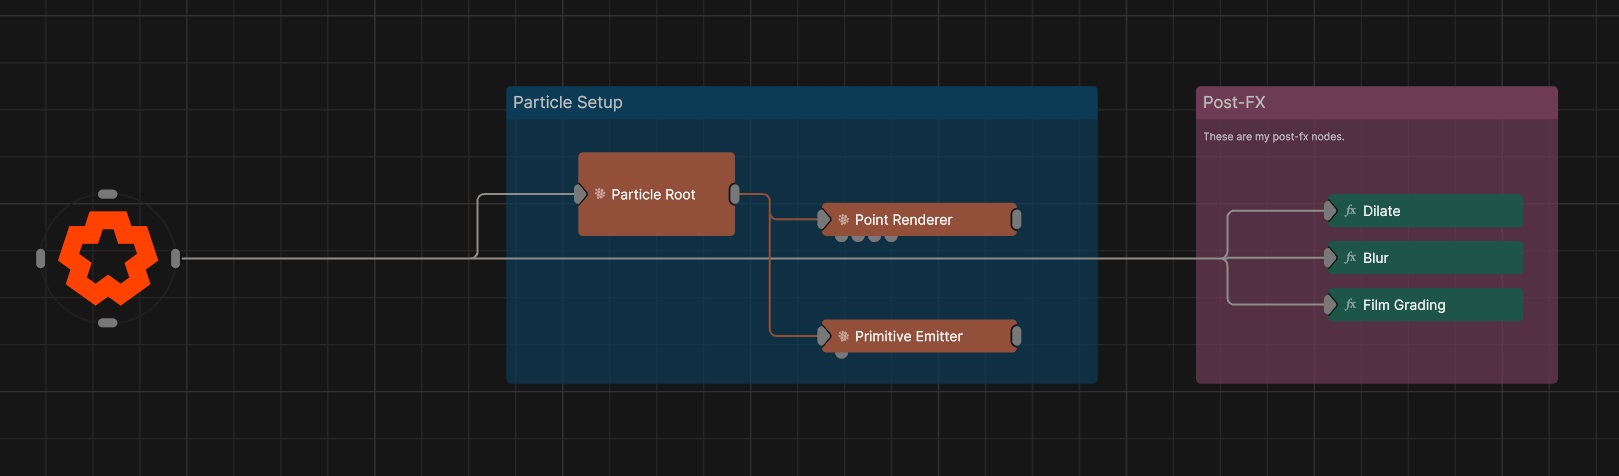
The Region Node allows you to create a coloured region directly on the nodegraph. This can be used to organize your node graph, for example when sharing project files with others. Regions are purely cosmetic and do not affect node evaluation or execution. Regions can be resized by dragging the corner or edge of a region.
Region nodes are really useful to outline what different regions of your node graph are doing what. By encapsulating one system in a region and labelling it, it’s obvious to anyone opening your project what it does.
You can add text within your regionto describe it’s contents.
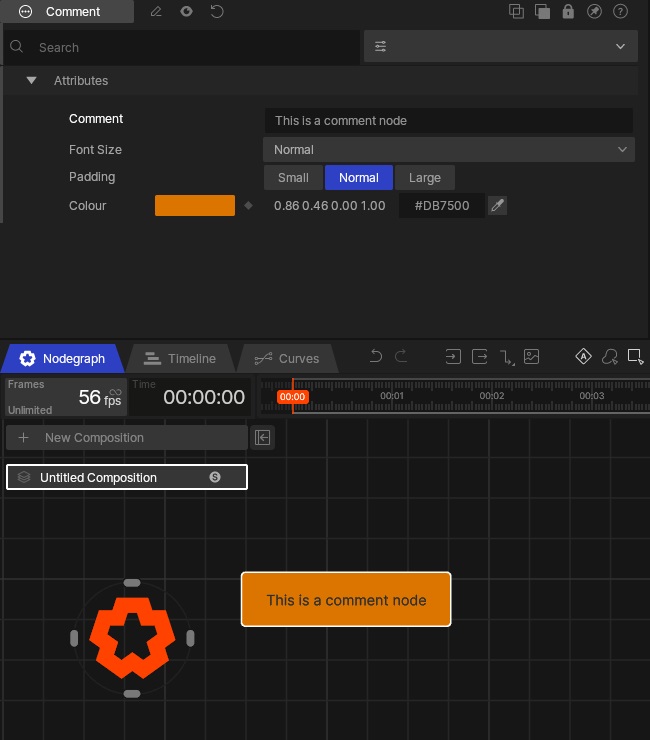
The Comment node allows you to add a comment to the nodegraph. The comment is applied directly to the nodegraph as a text string, and can be moved to wherever it is needed.
You can use comments as labels for certain features, or for instructions and notes.
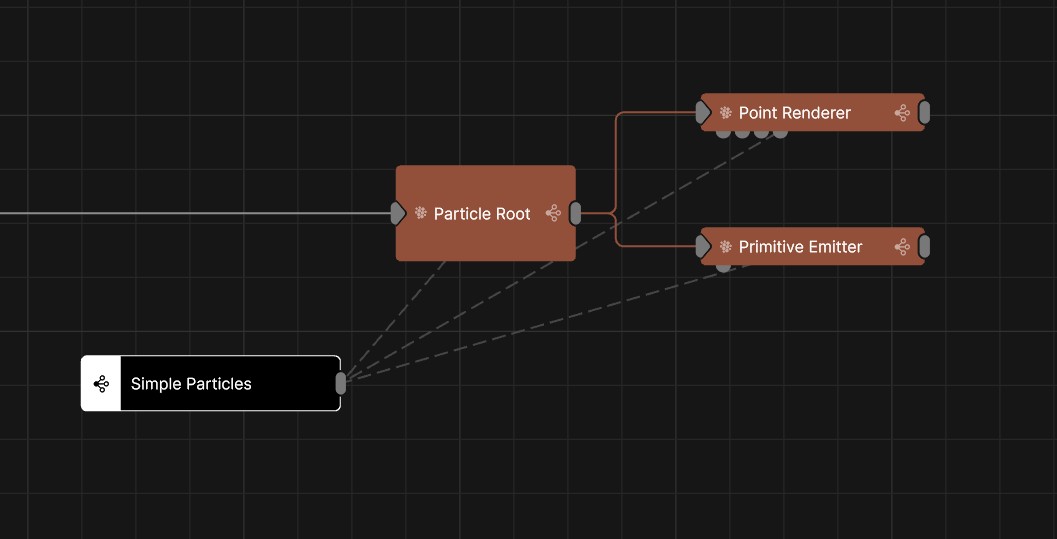
Selection Sets allow you to quickly manage the selection of groups of nodes.
Double clicking on the selection set node will select all of the nodes that are inside of that selection set.
This can be really useful to build in to your project so that you can quickly select a group of nodes to make them available in the timeline or curve editor, to adjust their properties, or to re-organise your node graph.
To create a selection set, use Ctrl + click to select multiple nodes. Then right hand click inside of the node graph and choose “create selection set”.
The selection set node will now appear on your node graph.
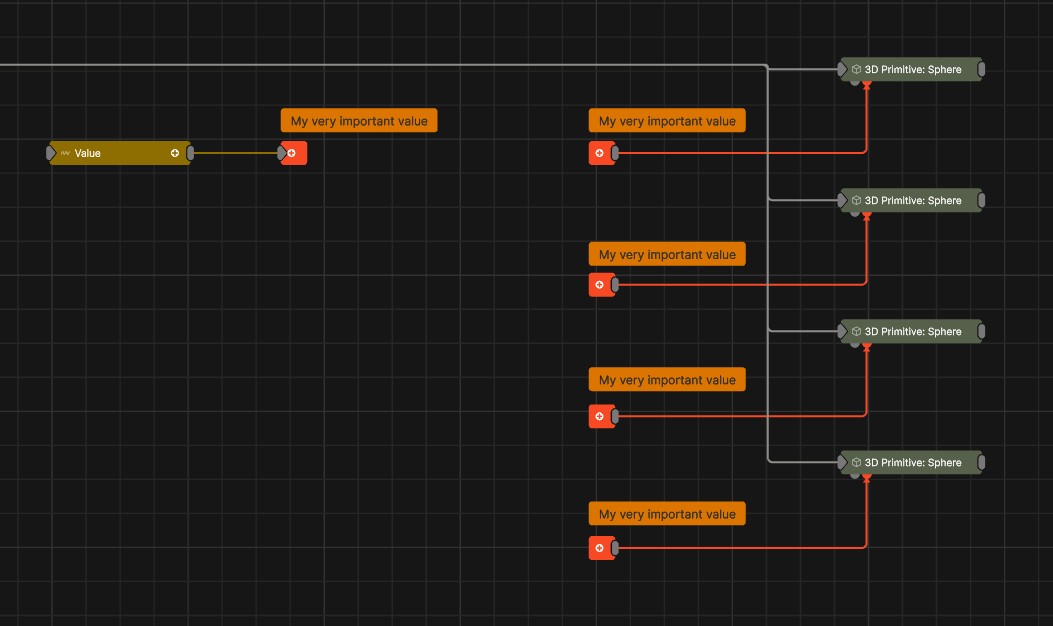
Holding shift while dragging from the output of any node allows you to make multiple connections at a time. Hold shift and click on multiple other pins.
To remove nodes from the selection set, select the selection set node, and then delete the links to other nodes with Ctrl + click.
You can rename this node to give a descriptive node by clicking on it and hitting F5.
The Bridge Node can make wireless connections across your nodegraph. This can be really useful when you have one node’s output being fed into lots of different places.
To help make your node graph more readable when using the Bridge node, it can be useful to colour code your bridge nodes. It can also be useful to create a Comment next to your bridge nodes to label them and keep your node graph readable.