Tips, Tricks and Best Practices
Updated: 23 Jan 2026
Updated: 23 Jan 2026
Once you’ve gotten to grips with particle systems and how to set them up and start tweaking them, that’s where the fun starts. This next section is just a small collection of little tips, tricks, some small gotchas and best practices to help you get the most out of particle systems.
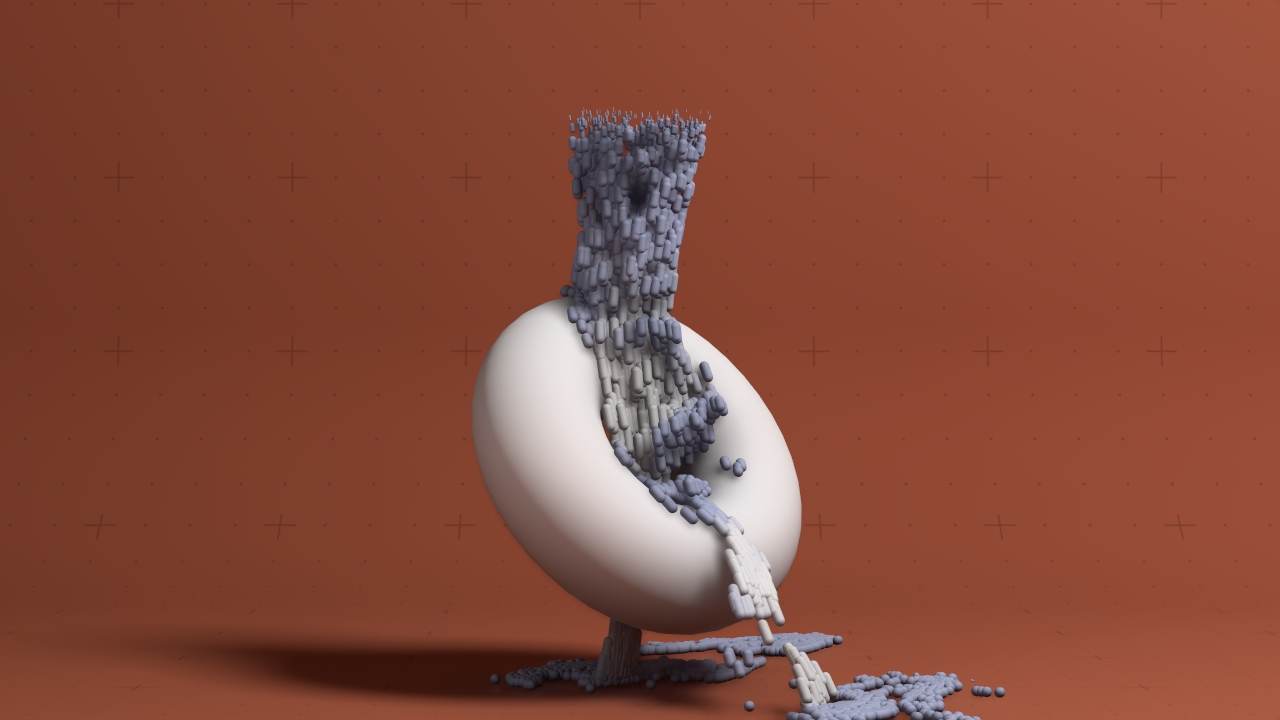
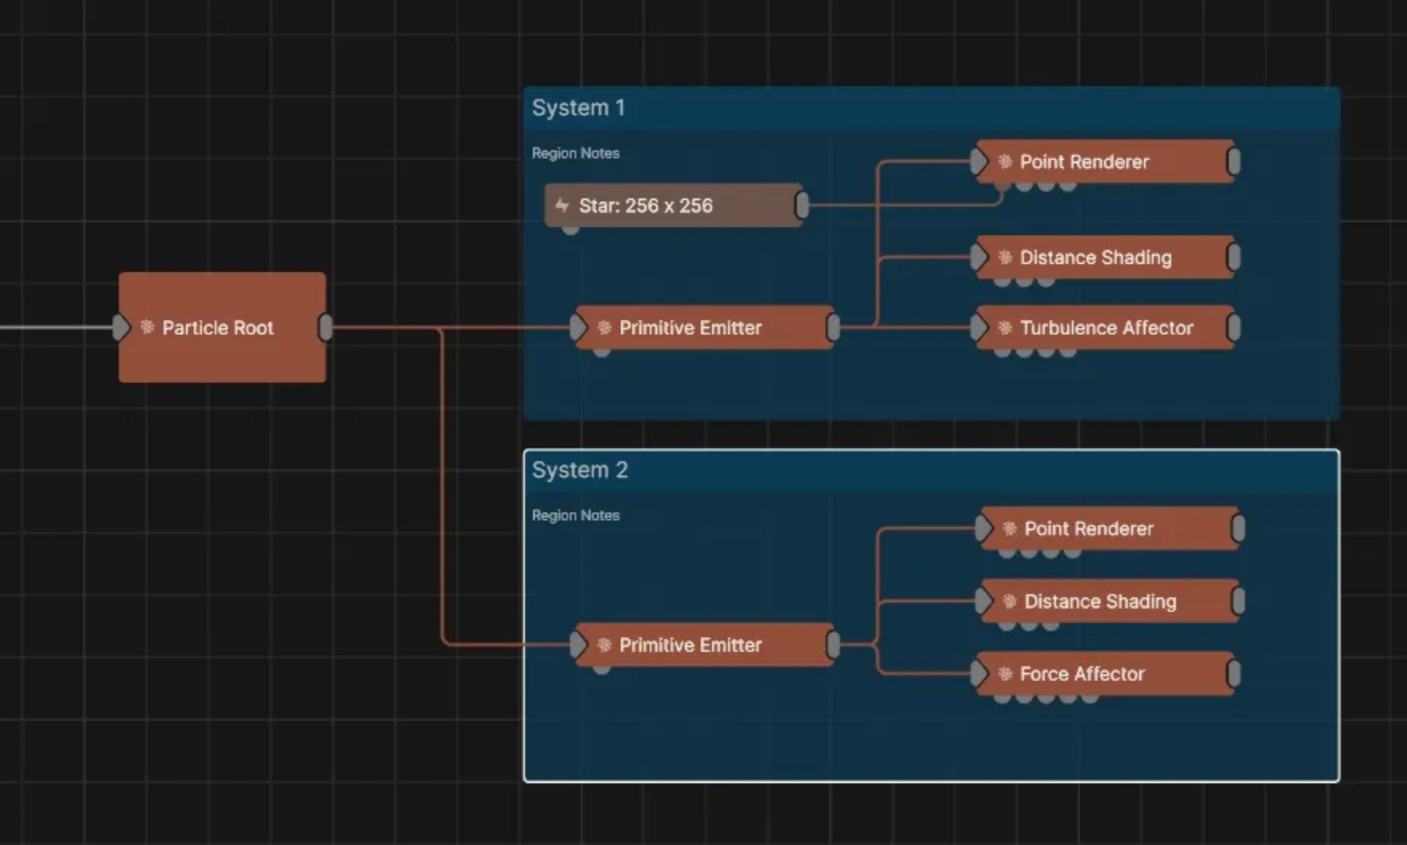
When making multiple particle systems, it can be tempting to create a new particle root, emitter, renderer and affector(s) for every separate type of particle you want to render. While that is totally possible, it is not ideal. A better approach to building multiple particle systems is to keep everything under one particle root node, and build multiple systems within it. This has the advantages that:
There is a few features that can help you create multiple particle systems under one root:
The Particle Root node contains a property called “Show Metrics”. Enabling this will bring up a text overlay on your viewport that shows you how many particles are present in each emitter at time. If you’re ever experiencing issues with particles not spawning when you expect them to, it’s pretty likely that you’re hitting the limits of your maximum numbers of particles without realising. Once an emitter has hit it’s maximum particle count, it will stop emitting.
Looking at the cold hard numbers can be a good way of getting a better idea of what is happening with your particle counts in each emitter and resolving issues.


Particle systems update each frame. In very simple terms, this is how particle affectors work out how far they have to move each particle and in what direction. With default settings, a particle affector is going to look at the time delta and work out how far the particle would have moved in that time. This is useful for when you’re frame rate may change, like when you’re working with an unlimited frame rate inside of Notch Builder.
In other cases though, you might want to not do this. In a lot of cases, you know you’re target frame rate, either for rendering out content, or for real-time playback. In that case, you might want to set the update rate to fixed. This guarantees, that no matter what the time delta between frames, the particle system will use the same delta, and move by the same amount. This can guaruntee repeatability and determinism in complex physics simulations like the fluid affectors.
Using a Time Stretch node before the particle root gives you a really easy way to adjust the speed of your entire particle system just in one place. Just put the Time Stretch node between your project root node and the partcile root node and then control the Time Stretch’s “Speed” property.
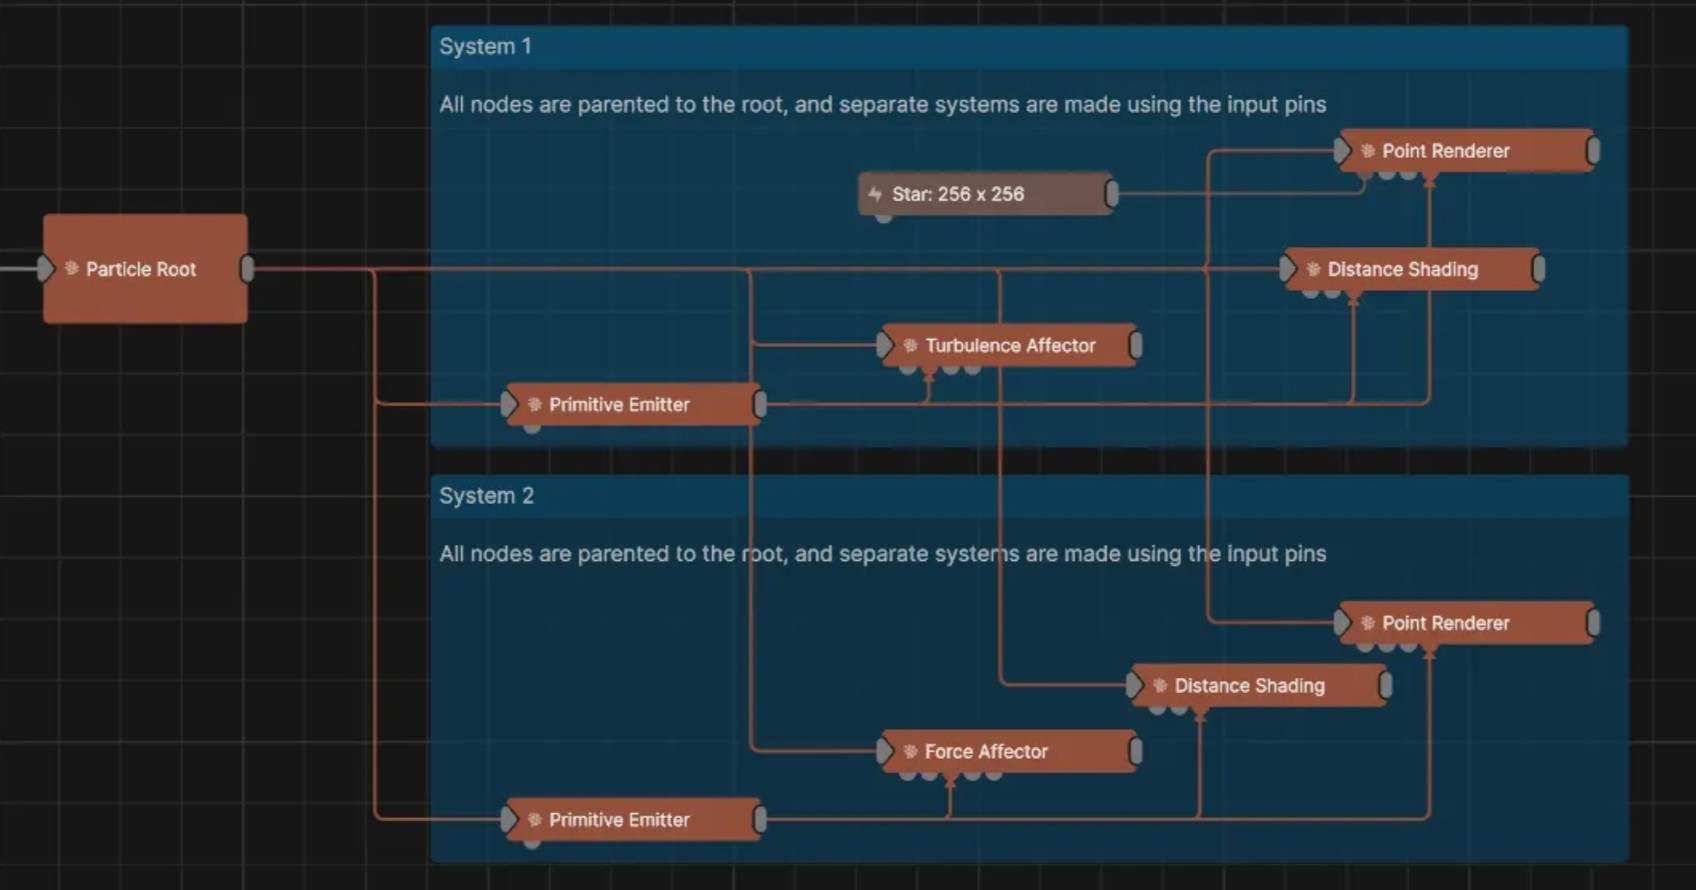
The Particle Cache Node deserves it’s own callout. You can find it under the emitter’s category, but it’s a got it’s own special functionality.
The particle cache node allows you to store the animation of particles to disk, essentially recording the output of all emitters and affectors. This allows them to be scrubbed in time and played back rather than simulated during playback. Particle cache files may be very large on disk. When the baking is finished, you can disable the other particle emitters / affectors, as they no longer contribute to the scene.
With some combinations of the Point Renderers and Scene Renderers, you may find some irregularities with depth sorting, and things not being occluded by particles (or vice versa) as you would expect. The particle point renderer is built to be really performant so that it can handle huge number of particles, and part of the compromise that’s been made there is in how it handles depth. This can cause some issues when using the faster renderers, such as the Standard Renderer.
When using the Standard renderer set to “rasterised”, you might see that your particles sometimes get rendered in front of other objects, for example fields. If you do run into this, there is a few options to solve it:
Particle Events are a great way to make more complex systems with particles. They can cause a change in a particle system when something happens to an individual particle.
For example, when a collision occurs between the particle and a collision surface, new particles may be emitted at that point. Or, when a particle reaches a certain age, it may change size and colour, or release new particles from it’s position. For something like fireworks, you could have one particle fired upwards, and as it dies, it emits much more particles to make the explosion of the firework.
Another use for particle events is that they can create one particle at a time, on demand. This is perfect for when you need complete control of when your particles get emitted. Things like interactive experiences, or audio reactive triggers. Using a Modifier like the Sound FFT Modifier or the Keyboard Modifier you can detect something like a drum hit or a key press, and feed it into the Trigger input of the Particle Event node. This gives you the ability to create an exact number of particles on command.
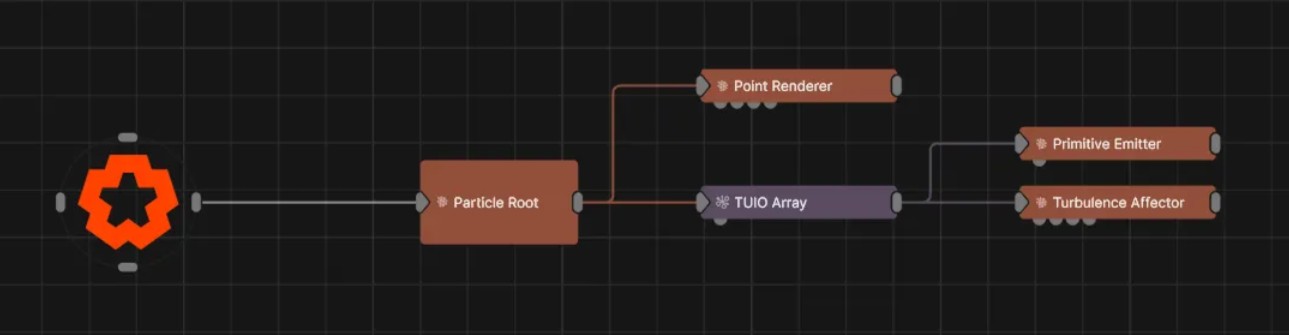
Particle Nodes can be created and moved using data coming form any of Notch’s Array Nodes. This simple setup let’s you create an emitter and an affector at each incoming position from the TUIO Array. Once you start expanding on this, you can make some really interesting interactivity really quickly.
One other little trick that can go a long way is using Transform Arrays fed by particle systems, in combination with Hot Zones. A Hot Zone basically monitors a volume of 3D space and detects if anything enters it. You can use this to create an event or effect when a particle enters the Hot Zone.
To do this, you need to go via a Transform Array. The Transform Array can take an input from the Particle Root (to get the position of every particle in the system) or any of your Emitters (so that it just gets positions of that emitters particles).
Here’s a really simple example where the Explode Affector is activated when a particle enters the Hot Zone: Particle Hot Zones
Like a lot of other things in Notch, particles get really interesting when you start using them as inputs, outputs, generators or affectors in other systems. This section is here to give you a little overview of the nodes that let you incorporate particles and particle techniques elsewhere in Notch.