Components of Particle Systems
Updated: 20 Jan 2026
Updated: 20 Jan 2026
Within particle systems, there are several categories of node. Each of these categories of node has their own function, and the different nodes within it give you a tonne of different possible looks. This section gives a brief overview of each of these sub categories, what they are used for, and some of the most important common properties that are common to that category of node.
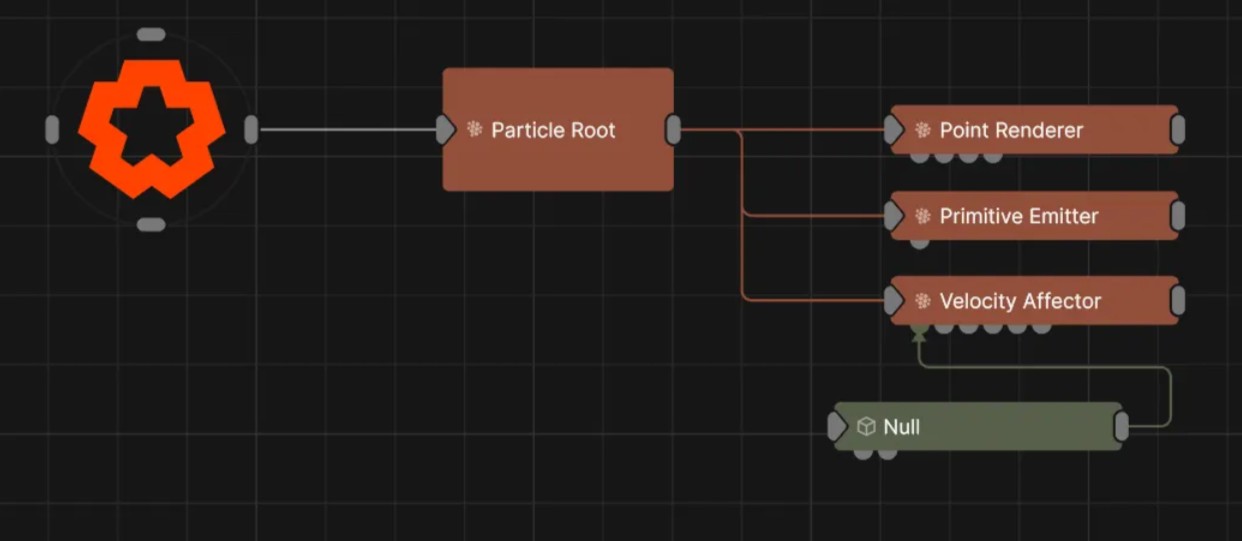
Particles live under a Particle Root node, and are created by Emitters. Once a particle has been emitted, it can be affected by Affectors. These particle positions can then be rendered by Renderers. Shading can be applied using Shading nodes. Weights can be used to control the amount another node will apply to each individual particle.

This node is essential as the basis of a particle system. It is used to define the entire system, such as the maximum number of particles, the update rate of the system, key global properties such as size, scale and brightness. All other particle nodes must be parented to this node to add them to the particle system. See the Particle Root’s Reference Page for a guide to it’s properties.
See This Section of this article for some more tips and tricks and best practices related to settings in the Root Node.
After the particle root node, the emitter is really where things get started. Emitter nodes spawn particles, that you can then manipulate and render. A simple example is the primitive emitter. This node will create particles either on the surface or within the volume of a 3D primitive shape.
See This Section of the manual for a comprehensive reference of the emitters, as there is a comprehensive collection of emitters that let you use a wide range of inputs to a particle system:
As well as actually creating the particles, the properties of the emitter node is where you can set the properties of the particles that will determine their behaviour. Some properties are unique to certain emitters, but this section will hopefully give you a useful overview of the most common properties you’ll need to adjust on particle emitters.
Simply turns the particle emitter on and off. If it is set to 0, no particles will be emitted. If it is set to a value of 0.5 or more, particles will be emitted.
This sets the maximum number of active particles that have been emitted from this emitter at any time.
There are two places where you can handle the maximum particle count. The first is on the particle root. Setting a maximum number of particles on the particle root sets the maximum number of particles for the entire particle system. This setting on the emitter is just for that one emitter. The particle root node’s setting should be a number greater than or equal to the total number of particles that can be produced by your emitters.
All particles have a life time, from when they are emitted, to when they disappear. Just like the rest of us. Sadly, theirs is measured in seconds. But happily, a new particle will be emitted once they die.
Disabling this means that particles only be emitted once. When they die, they will not be respawned. Enabling it means that the emitter will continue to emit infinitely. For a sudden explosion of particles, you might want this off. For a constant flow or stream, you’d want it on.
This value gives randomness to the lifetime of particles in the emitter by randomly reducing the life of particles. The property defines the range to which the lifetime will be randomised. When it is 0, all the particles will live to the maximum life time specified by the “life property”. When it is 0.5, the particles’ life times will be randomised between their maximum life time and half their maximum life time.
This property determines the rate at which the particles will be spawned. The emission rate dictates what percentage of the maximum number of particles will be spawned, per second. A value of 1 means 100% of the particles from the max particle count will be emit every second. A value of 0.1 means 10% of the particles from the max particle count will be emit every second.
See This Tutorial for more information on controlling particle emission.
Gives randomness to the movement of particles.
Each particle has colour properties, which are used when you get to rendering and shading your particles. This sets the colour that your particle render on birth.
How long it takes the particle to fade in. This is a ratio of how far through the particles life that it will be fully faded in by. This property is used by particle renderers, or when feeding particles into other systems.
How long it takes the particle to fade in. This is a ratio of how far through the particles life that it will be when it starts fading out.
There are several properties that determine how particles will act when part of a simulation. These are only relevant for certain simulations when using certain Affetctors.
Particle Affector Nodes modify the movement of particles. There is a huge range of affectors, that let you use pretty much anything else you can get into Notch as an input to effect your particles in various ways.
Some affectors will apply a physics simulation to all of your particles, such as the Fluid FLIP, Fluid MPM and Fluid SPH Affectors. Others will just apply a simple directional Force or Velocity to your particles.
[The Reference Section ](Particle Affector Nodes of the manual will be your friend if you’re looking to compare and understand all these different nodes. But for now, just know that they al make your particles move in different ways.
These properties determine the strength of the effect that the affector will have on the particles. For example, for a velocity affector, it will determine how much velocity is applied to the particles.
This sets the radius in which the particle affector will be applied.
By default, this is just a spherical radius. You can get much finer control of the volume in which your particle affector is applied by using Procedural Falloffs
Applies a randomness to the amount of the affector’s impact.
This lets you scale the amount that the affector will be applied at different times throughout a particles lifetime. The y axis of this graph is the particle affector scale amount. The x axis is the normalised lifetime of the particle. In this example, the affector amount would increase fairly quickly to a maximum and then die away.

You can feed any node into this input pin to modify the affector’s position by the position of another node. This can be useful if you want to tie the affector to another 3D object.
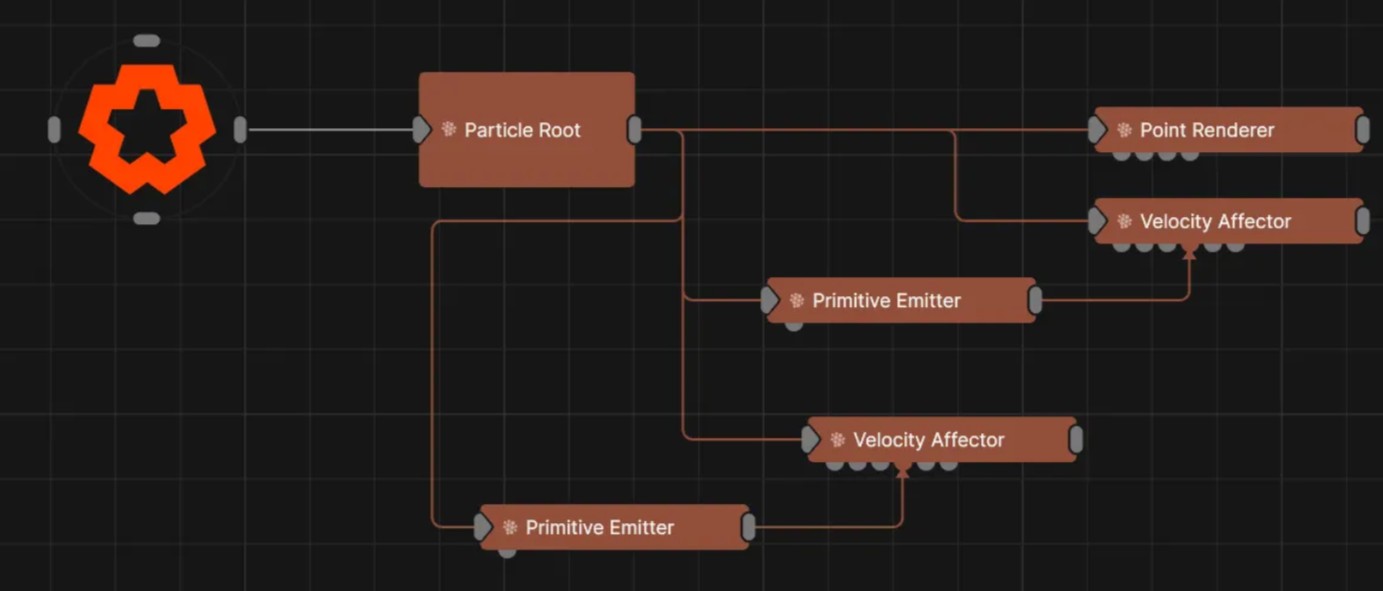
By default, when its connected to a particle root, an affector will be applied to all particles within its radius. This input can let you target certain affectors to certain emitters’ particles only.
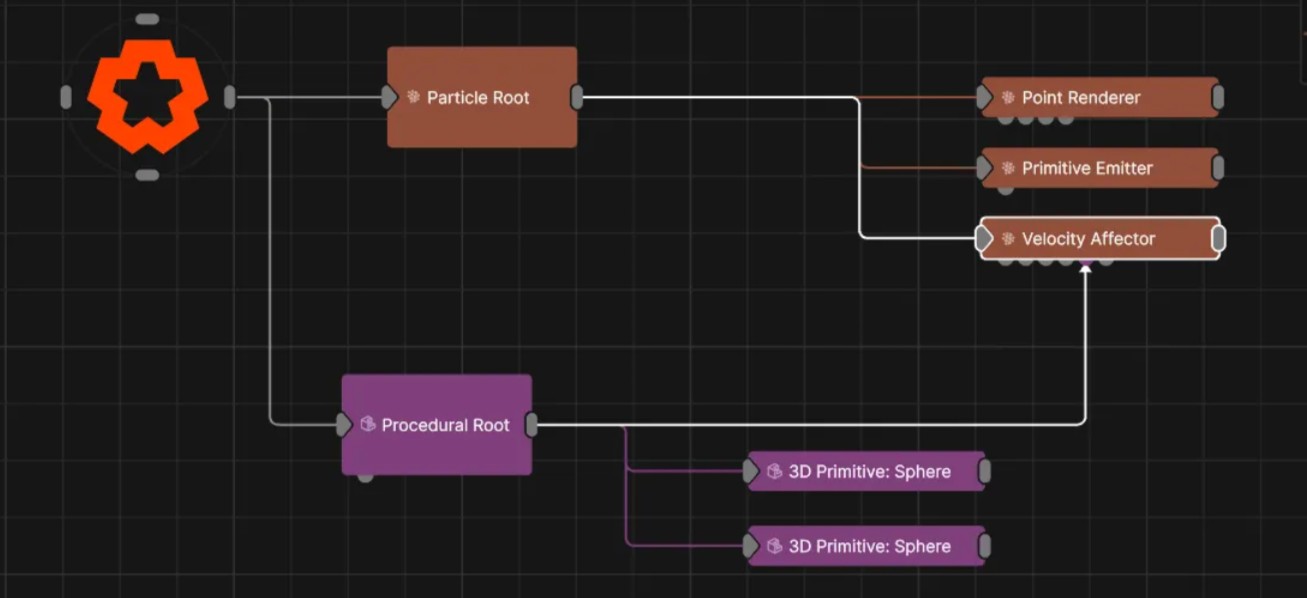
This input pin can be fed by a Procedural System to determine the volume in which the affector will be applied. This lets you customise the area of the affect however you like.
Weights can be used to adjust the amount the affector is applied to each particle. Wouldn’t it be nice to read more about weights in particle systems…
You can use Weights to adjust the amount of effect that a particle affector will have on different particles. Weights can be created form a variety of sources, and then used as an input to Particle Affectors. Weights are calculated and applied on a particle by particle basis. Use them to give more control and dynamism to how affectors are applied to emitters.
By default, when its connected to a particle root, an weight will be applied to all particles. This input can let you apply weights to certain emitters’ particles only.
Rendering Nodes are, simply put, the things that are going to let you actually see your particles. They visualise the particles by spawning images, meshes, trails and others. Multiple rendering nodes may be connected to the same particle system, allowing the same particles to be rendered in multiple different ways at once.
Any rendering nodes need to be connected to a Particle Root node directly or indirectly, and they will only render particles within that particle system.
Particles themselves are just points, they don’t actually have a size. When you come to render them, you’re using the positions of the particles to render something. So it’s this property that determines the size of the thing you are rendering, based on the positions of the particles.
This gives a randomness to the size of the rendered object. When it is 0, all particles will render at the size given in “[article size”. When it is 0.5, the particles’ sizes will be randomised between the given size and half the given size.
The alpha of the rendered object.
The ratio of particles within the system that will be used by the renderer. By default a renderer will apply to all particles within the particle system. you can reduce this so that not all of the particles are rendered.
Adjust the scale of the particle over time. This is where the fade in and fade out time on the particle emitters come in to play to adjust scale based on particle lifetime.
How the particles are drawn e.g solid, additive etc.
By default, when its connected to a particle root, a renderer will be applied to all particles. This input can let you render only specified emitters’ particles.
Shading Nodes change the colour or position of the particles in various ways. Some shading nodes are used to tint particles based on their own individual attributes such as their life or velocity; others consider them as a system and shade them by density of particles in a given area; and others use properties from the scene in order to generate lighting and shadow effects. Some other shading nodes generate displacements which are used to offset particle positions at render time.
The generated colour or position is only used at render time and is recalculated every frame, so its state is not stored. Multiple Shading nodes may be used on one set of particles and blended together. They are evaluated in node order. Any Shading nodes need to be connected directly or indirectly to a Particle Root node, and they will only apply to particles within that particle system. If Shading nodes are parented to a particular Particle Emitter they will only apply to particles spawned from that emitter.
See This Reference Section for a detailed breakdown of all of the available shading nodes for particles.
By default, when its connected to a particle root, a shading will be applied to all particles. This input can let you shade only specified emitters’ particles.
Weights can be used to adjust the amount that shading is applied to each particle.