Using The Render Queue
Updated: 27 Jan 2026
Updated: 27 Jan 2026
The Render Queue is used to add and stack multiple render jobs so that they can all be rendered out with one button. Each job in the queue contains the source composition, along with its own set of render settings such as resolution, frame rate etc. This allows you to set up lists of compositions renders, all with their own unique output settings, creating a workflow which allows you to make changes to your compositions, and then render them all out again without having to manually do each one by one.
This workflow is particularly useful when you have many compositions, particularly if they all have different resolutions and output formats.
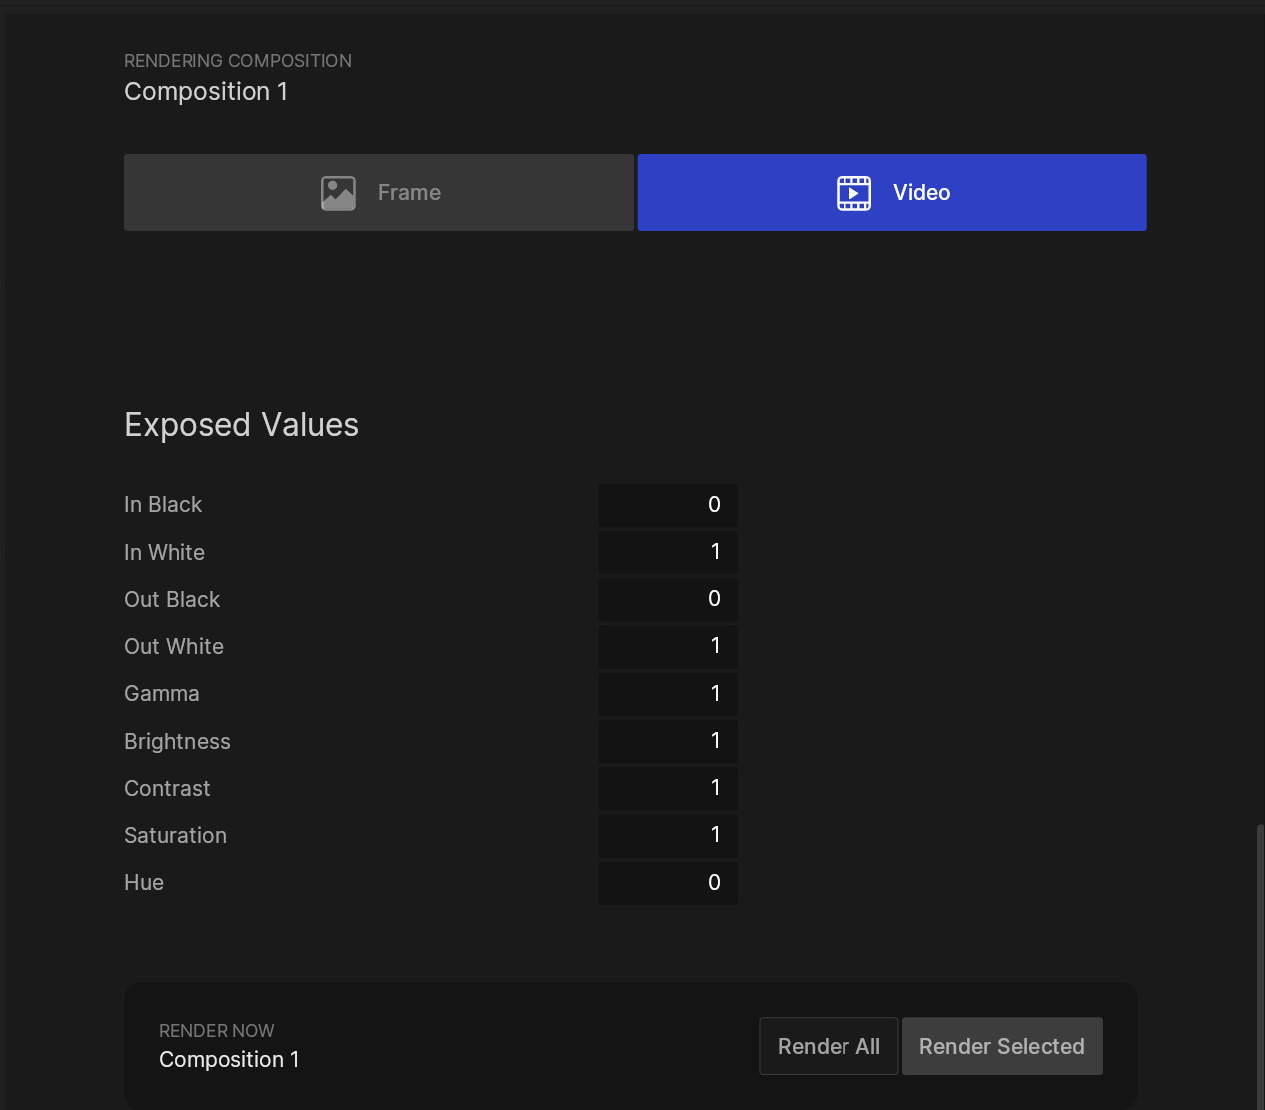
In addition to the standard render settings that are included by default in each item in the Render Queue, you can also expose Render Parameters from your compositions and make them available and editable in each render job. This allows you to have multiple render items in the queue which have the same source composition, but can be used to output variations based on how the Exposed Render Parameters are set.
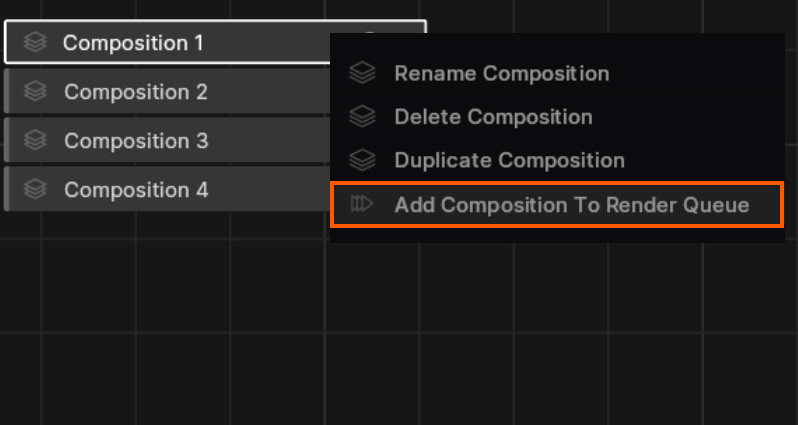
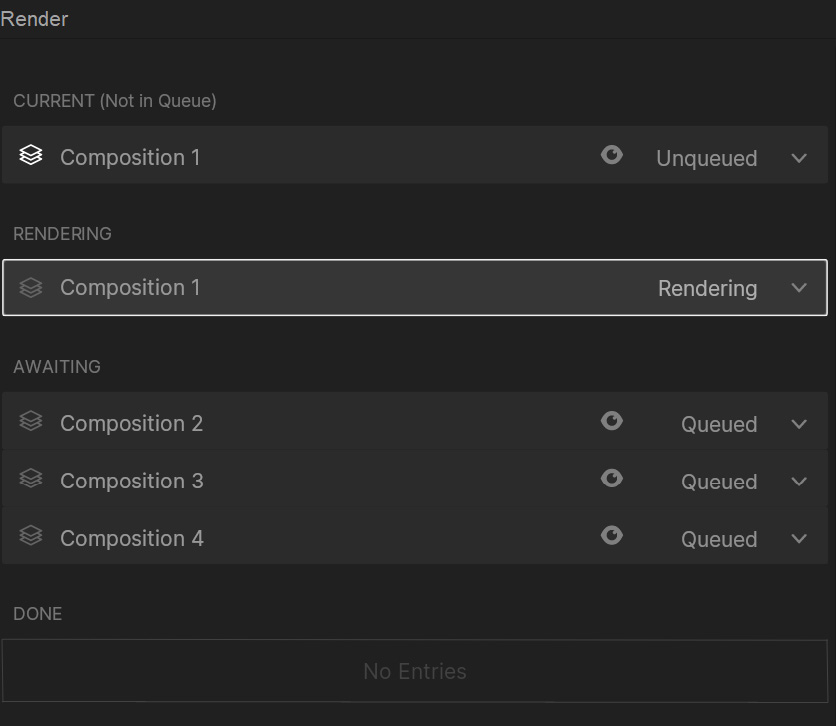
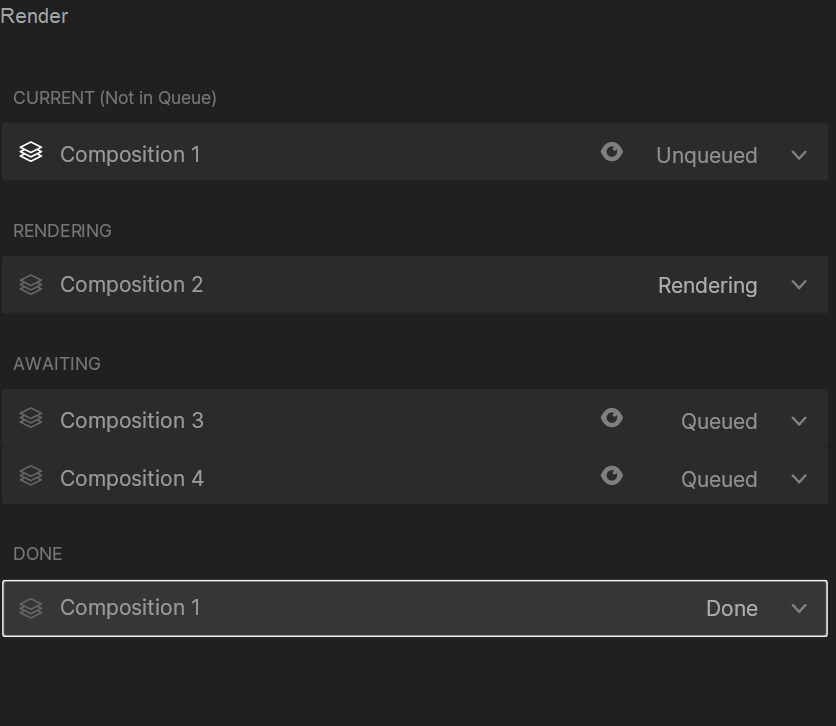
Render Queue items are split into 3 categories:
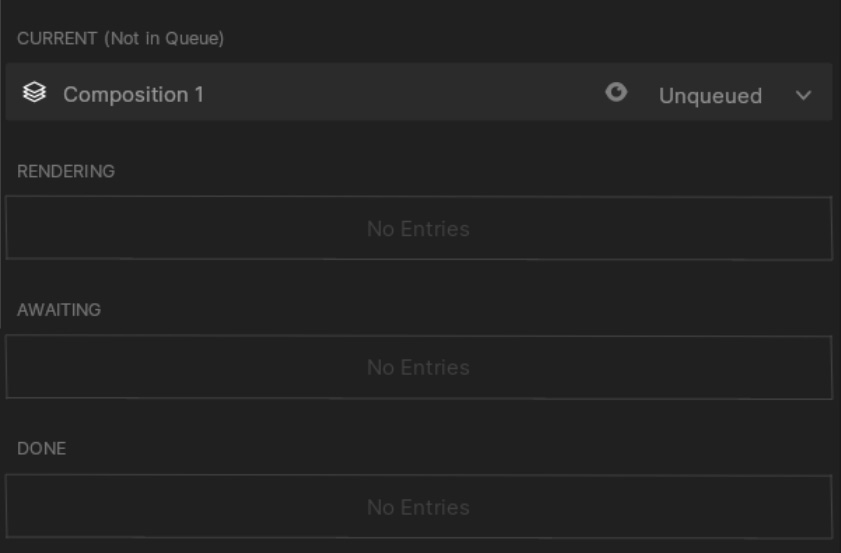
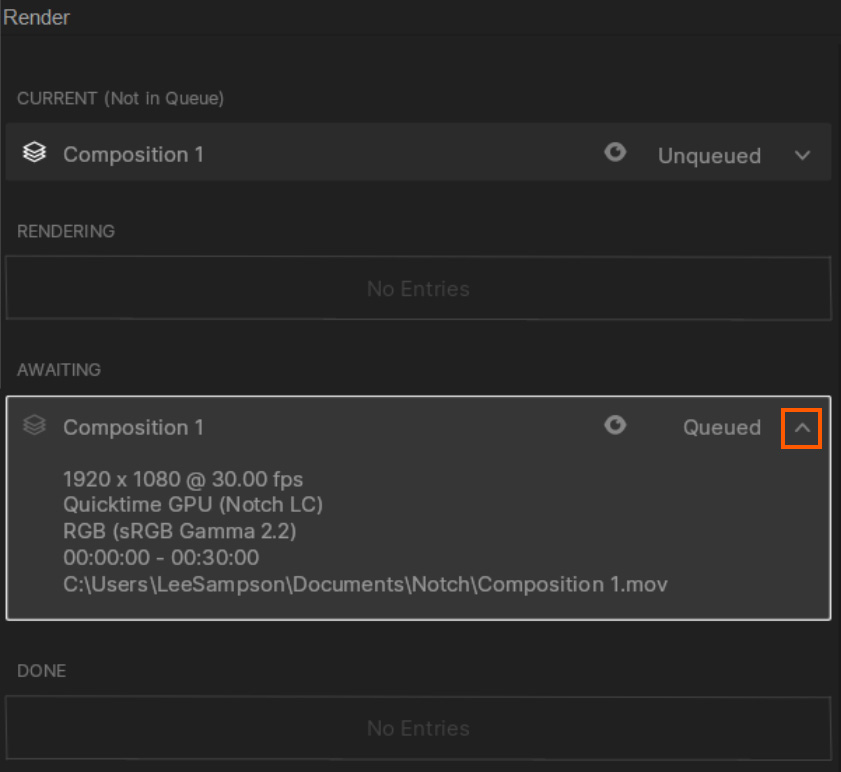
Once a composition has been added to the Render Queue, it will appear in the “Awaiting” queue.
You can view its current settings by clicking the information dropdown tab on the render item.
To change the settings of a render item, click on it to select it, and then use the Render Settings to change the settings for that item. As you do this you will see that they change in the information drop down in the Awaiting queue.
You can also click the “eye” icon to mute this item from being rendered with the rest of the queue.
Once you have all of your render items in the queue, you can either render each one individually by selecting it and hitting the “Render Selected” button, or to render the entire queue, hit the “Render All” button.
Once you hit “Render all”, you will see that the currently rendering item goes into the “Rendering” section of the Render Queue. When its does it will move to the “Done” section, and the next item will be moved to the “Rendering” section.
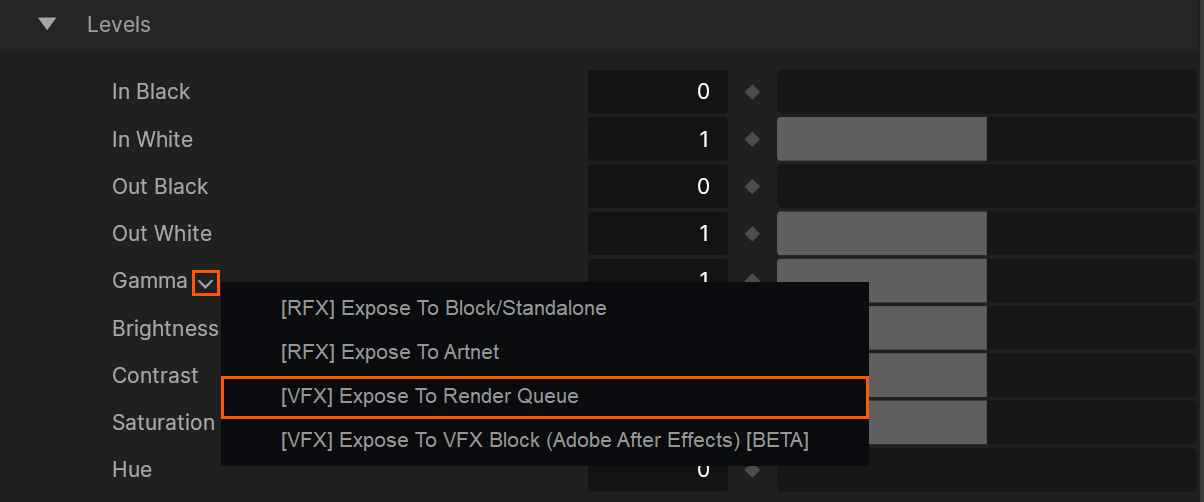
A very useful feature that you can use with the Render Queue is exposing parameters to the Render Queue. This allows you to send a composition to the render queue multiple times, but importantly set any exposed parameters to different values per item in the queue, allowing you to create variations of the same composition at the Render Queue level.
To exposed a parameter to the render queue:
Now this parameter will be available to control for each item in the Render Queue that uses this composition as the source.
Once you have exposed parameters to the Render Queue and sent the corresponding composition to the Render Queue, all of the exposed parameters will appear at the bottom of the Render Settings panel.
You can now set these parameters independently per render item in the queue, allowing you to create different variations of the same composition.