Network Editing
Updated: 14 Jan 2026
Updated: 14 Jan 2026
Notch RFX (and Builder Pro) can be used to remotely edit Notch Blocks or Standalone applications that are running on the same network. Once connected, any changes made inside of Notch RFX will be instantly reflected in the Notch Block or Standalone application as long as it is running.
The communication is bi-directional, and also allows Notch RFX to read performance stats and profiling information from the block running remotely.
It’s possible to connect one PC running RFX to multiple Notch Blocks at once, and make changes across a wide number of machines.
In practice, this is often used for making adjustments to an existing Notch Block while in production or rehearsals.
This feature is intended for pre-production and on-site adjustments, making it especially useful for last-minute changes. However, it must never be used during a live performance, as glitches are likely. Note that any edits made remotely are temporary - once the Standalone or Notch Block instance is closed on the media server, those changes are lost. To make adjustments permanent, you’ll need to re-export and reload the Block on your server.
When a Notch Block is running, it opens up a lightweight server that allows it to send and receive messages across the network. The Notch Block will communicate over the default adapter of the machine it is running on. Therefore, the IP address of the Notch Block will be determined by default adapter, which is set up in Windows. (Control Panel > Network and Internet> Network Connections). The default Windows adapter is determined by whichever adapter has the lowest Interface Metric.
When a block opens, it will go through a process of finding an available port to communicate on. It will first try and open communications on port 3776. If this is used, it will step through incrementing port numbers until it finds a port that is available to communicate on. This means that both the IP address and the port that are chosen by the block are handled automatically, and don’t need setting manually.
When working with Network Editing inside of Notch RFX, the software will run network discovery using UDP, starting on port 3783, again on the default adapter. Once a connection is made, all of the network messages that facilitate network editing are sent via TCP. In multi-machine environments, you will need to be aware of PC names, IP addresses and block names to ensure you are connecting and disconnecting to the correct machine at any time.
A network editing session will persist as long as the block is loaded into memory of the media Server. Once the block is unloaded from memory, the changes will not persist. To make these changes permanent, you do need to export a new Notch Block or Standalone Application from Notch RFX.
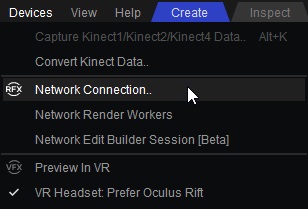
Inside of Notch RFX, there are two useful places for working with Network Editing. Connecting and disconnecting to Notch blocks is handled inside of the Network Connections panel (accessed from Devices → Network Connections). Connection information and network editing messaging information can viewed in the Connection Monitor panel (accessed via View → Connection Monitor).
Open the Devices menu and select “Network Connections” to access this panel.
Remote network editing is only available with Notch RFX and Pro licenses.
This is the easiest way to connect to a Notch block, using a list that is auto populated via network discovery. In some extremely complex setups with many servers, you may want to focus in on specific machines by their IP addresses. That process is described in the following section.
Before connecting, ensure that you’re Notch project (.dfx) and Notch Block (.dfxdll) are in sync. i.e. ensure you have Notch RFX running with the same project that you have used to build the Notch Block. It is possible to connect to different blocks using network editing, but to work efficiently, its best to have an identical project open to the block you are network editing into.
1 - Ensure that you have a Notch Block running on your network.
2 - From the Devices menu, select “Network Connection”
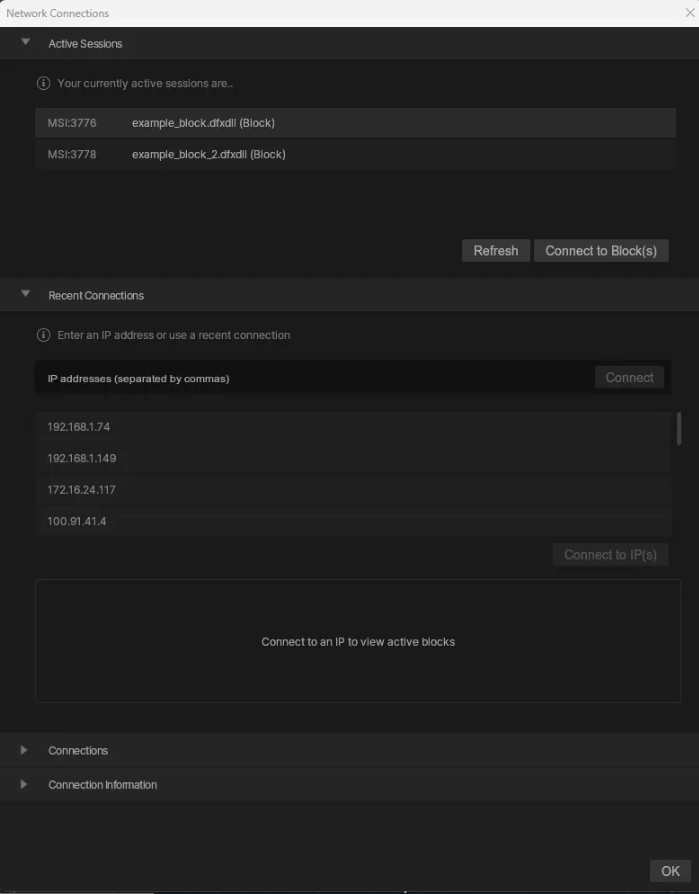
3 - In the top of the window, you will see a section labelled “Active Sessions”. This panel will auto-populate with a list of all of the Notch Blocks that have been found on the Network. You can refresh this list with the “Refresh” button.
4 - The left column of information will show the PC name, and the port being used for the session. The right hand column will show the name of the Notch Block.
5 - To connect to a block, click on the block you want to, and click on and hit “Connect to Block(s)”. You can also use Shift and Control to multi-select entries from this list, which will allow you to connect to multiple blocks at a time.
6 - Once connected, you will the connections appear within the Connects panel of the window. You can also see a read-out of the number of current connections under “Connection Information”
7 - Once you have verified the connection has been made you can exit this window by pressing OK. Any changes you make in Notch RFX will now be reflected in the Notch Block.
Rather than using the auto populated list of available sessions, you might want to hone in one particular machine to connect to. This is done by identifying machines by their IP address.
Before connecting, ensure that you’re Notch project (.dfx) and Notch Block (.dfxdll) are in sync. i.e. ensure you have Notch RFX running with the same project that you have used to build the Notch Block. It is possible to connect to different blocks using network editing, but to work efficiently, its best to have an identical project open to the block you are network editing into.
1 - Ensure that you have a Notch Block running on your network.
2 - From the Devices menu, select “Network Connection”
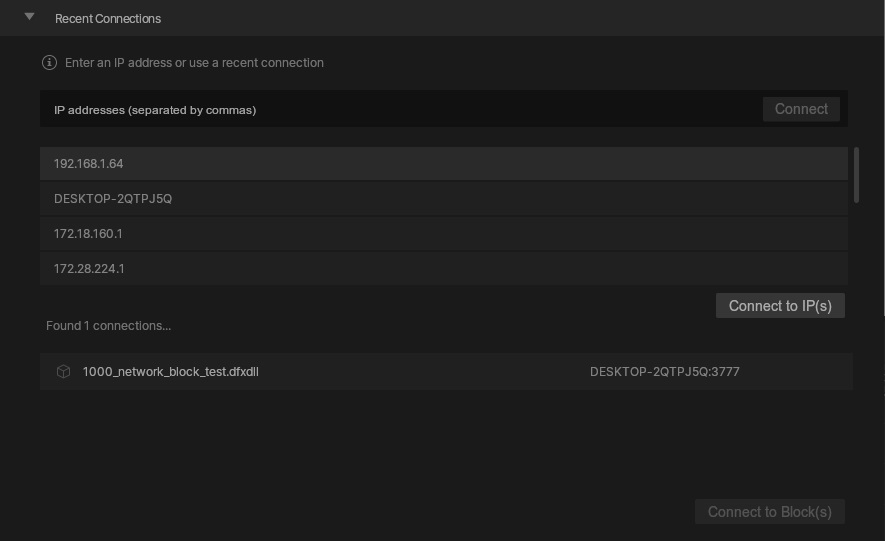
3 - In the second panel of the window, you will see a section labelled “Recent Connections”. This panel will auto-populate with all of the IP addresses that you have connected to. To connect to these IPs you can select an IP address and hit “Connect to IP(s)". If you want to connect to an IP address for the first time (so not already in the list), you can enter the IP address and hit “Connect”.
4 - This will now populate a list of the available connections on your chosen IP Address. The left column will show the name of the Notch block on the left column, and the IP address and port number in the right column.
5 - To connect to a block, click on the block you want to, and click on and hit “Connect to Block(s)”. You can also use Shift and Control to multi-select entries from this list, which will allow you to connect to multiple blocks at a time.
6 - Once connected, you will the connections appear within the Connects panel of the window. You can also see a read-out of the number of current connections under “Connection Information”
7 - Once you have verified the connection has been made you can exit this window by pressing OK. Any changes you make in Notch RFX will now be reflected in the Notch Block.
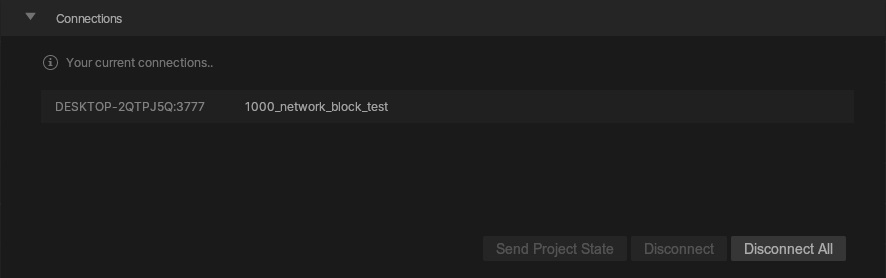
After a valid connection is established, it will appear in this list. Use “Disconnect” to end a single connection, or “Disconnect All” to end all active connections.
Provides feedback on the success or failure of connection attempts.

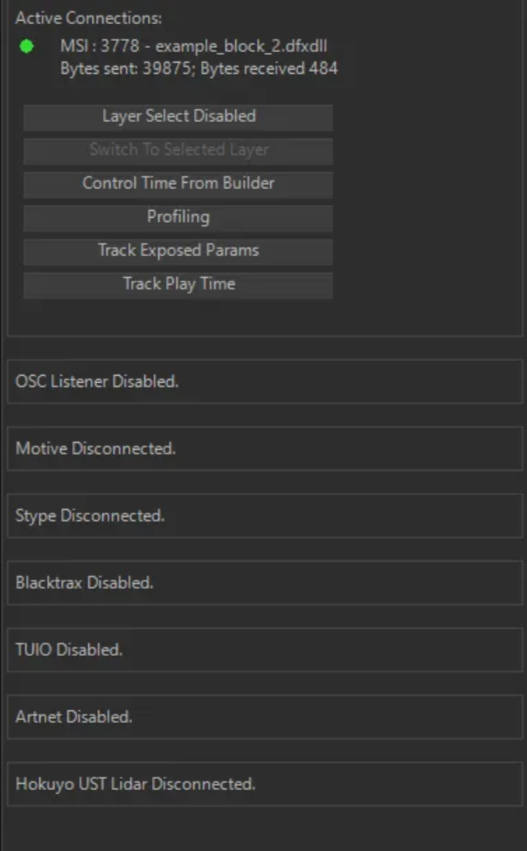
The connection monitor panel will show information on the active network connections from Notch RFX. The readout will show:
Further Information #
- Remote connections communicate via TCP/IP, with each standalone or block listening on an automatically assigned port.
- Remote editing works over both wired networks and stable Wi-Fi connections.
- Newly created or refreshed resources are not synchronised during an editing session.
- The playhead position and active composition are intentionally not mirrored on the remote standalone or block. Use the media server, WebGUI, OSC, or ArtNet to control playhead and layer selection.