Exposed Parameters
Updated: 5 Jan 2026
Updated: 5 Jan 2026
Exposed Parameters allow external applications to control data in a Notch Block or Standalone Application, allowing Notch content to be reactive and dynamic to the data supplied, in real time.
Exposing a parameter creates a pathway for external apps to override specific properties in the exported Block or App, which can replaces videos, numerical values, and other basic properties.
This allows for Notch content that can both be seamlessly integrated into a sequenced timecode and reactive to real-time data.
Exposed Parameters are only available on RFX licenses. Opening a project with exposed parameters in other licenses will have the exposed parameters removed from the project.
To expose a parameter, mouse over the parameter in the property editor and select [RFX] Expose To Block/Standalone.
Once a property is exposed, the data it represents will be completely overwritten by the data from the Media Server. You can manage all of your Exposed Parameters from the Exposed Node.
When network editing, new exposed parameters won’t be exposed to the live block. You’ll need to save the project, re-export the block/app, and either reload it in the Media Server or restart the standalone application to see the new parameters.
The vast majority of properties in notch can be exposed, including:
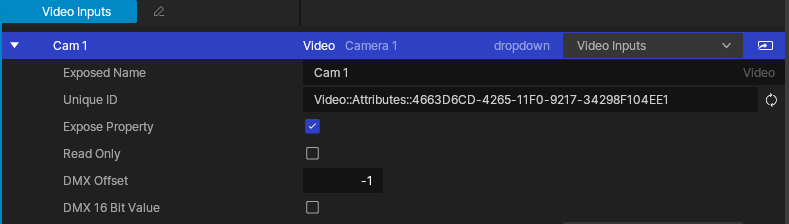
By default, each exposed parameter will be circulated with its own unique ID. This ensures they are treated as separate and distinct entities by the Media Server or Remote.
However, it can be useful to have parameters share a Unique ID. This is commonly done in scenes with multiple compositions, where a single Unique ID can be used across many compositions, maintaining connections for properties which provide repeating functionality.
The way you can control which parameters are shared and which are not, is by setting the “Unique IDs” of each parameter. If two Exposed Parameters in different compositions share the same Unique ID, then they will be linked.
By default, exposing a parameter will assign it with its own distinct Unique ID. So to connect a parameter to another one, you must copy and paste its Unique ID into the “Unique ID” field of the other.
Exposed Parameters give you complete control of your looks in real time, but there a few considerations that can help maximise their effectiveness. This page contains some guidance, that you are free to ignore, for how to approach Exposed Parameters.
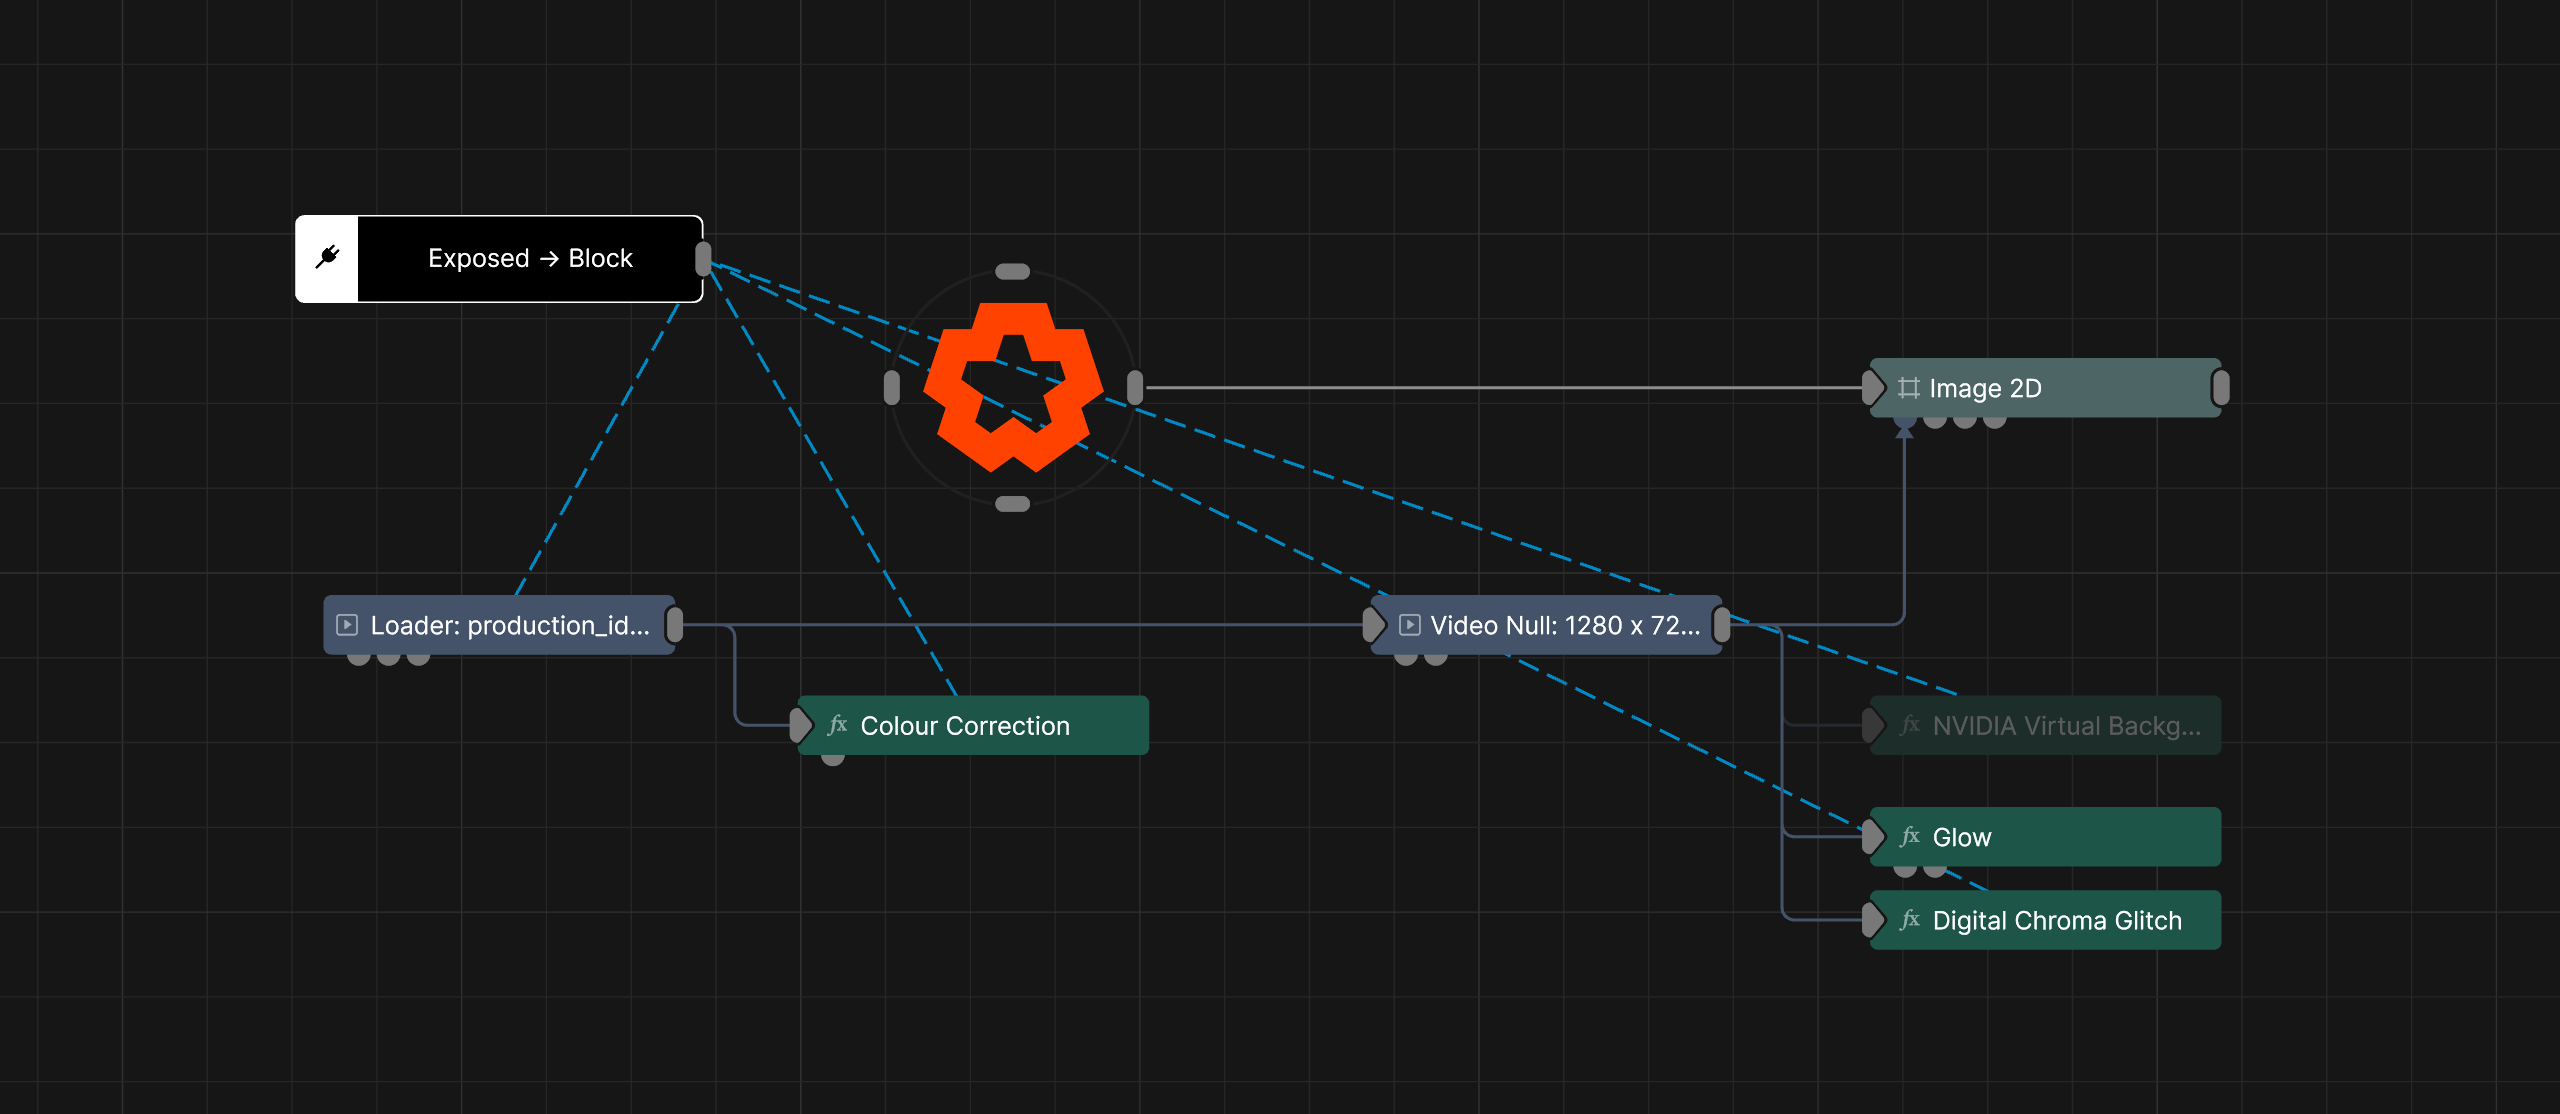
The way you layout your Nodegraph as you add Exposed Parameters is important to making sure that it makes sense when you need to come back to it, or people are looking at it for the first time. When you expose properties on a node directly, it can be hard to see at a glance what is being controlled, and from where.
One alternative to exposing the property directly, is to add a separate node, and then connect that to the property you want to control. The new node’s value can then be exposed instead of the one in the target node . This allows you more freedom to arrange the exposed node in the Nodegraph, which in tern allows you to arrange things more clearly by:

It can also be useful to keep all exposed properties together in the Nodegraph, with Comments and Regions to explain what controls what. Bridge nodes can also aid this workflow, by reducing the visible lines in the graph, and therefore reducing clutter.
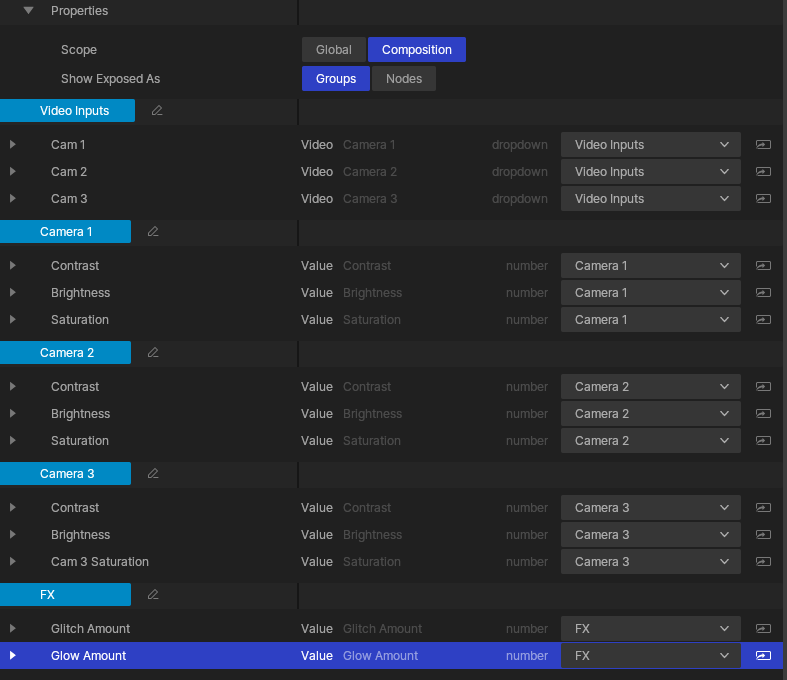
Once a Notch Block is loaded inside of a media server, the Exposed Parameters and the groups they belong to will be visible for the active composition. Groups are a good way to make it clear to anyone programming a Notch Block what does what.
If several properties relate to one function, group them together so it is clear that they work together. For example controls to adjust an incoming camera feeds, give each camera feed its own group of controls, so those parameters can be quickly found and adjusted when needed. Groups (and parameters inside of groups) can be re-ordered by clicking and dragging them inside of the Exposed Node’s properties.
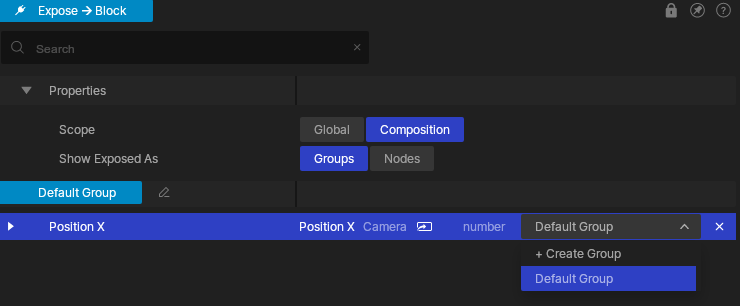
To make a new group, click on the “group dropdown” in the Exposed Node’s property editor menu.
Now click “+ Create Group”.
Once the new group is created you can rename it by clicking the pencil icon next to the name.
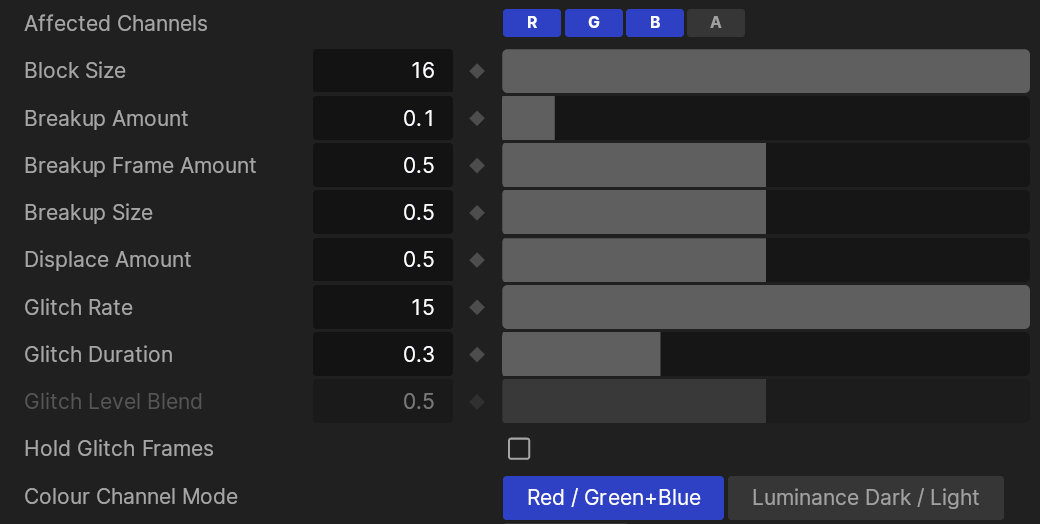
Modifiers are a really useful way to map one Exposed Parameter to multiple elements in your Nodegraph. This can give you one control in your DCC (Digital Content Creation tool) that can be scaled and adjusted to give a big change in the overall look of your scene. Some of the useful modifiers for this are:
Each modifier node has an “operation” property. This will change the way in which it modifies the parameter it controls. You can change this to have a modifier add, subtract, multiply or replace the value of the property it is modifying. This is something else worth considering when you’re setting up your Exposed Parameters.
In terms of exposing parameters, nodes that require audio work slightly different from other nodes. Audio can’t be passed in directly from a media server, so you will need to set up your audio capture settings inside of your Project Settings. See Audio Devices for more information.