Alpha Blend Material
Updated: 4 Nov 2024
Add a basic transparent material using a alpha blending.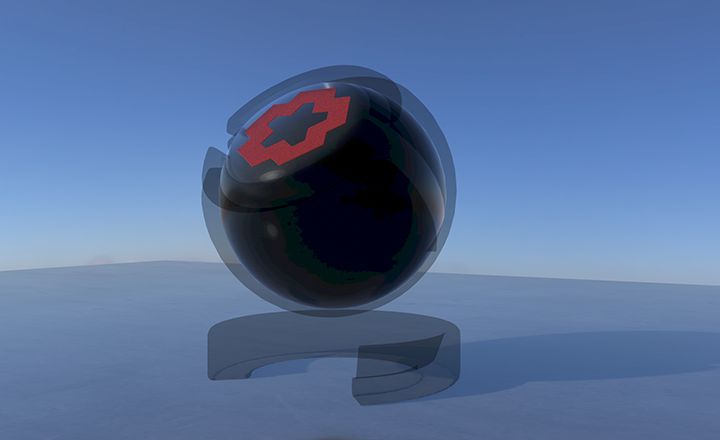
Updated: 4 Nov 2024
Add a basic transparent material using a alpha blending.
This node generates a basic transparent material using an alpha blend.
The output material can be applied to any node which accepts a material input, such as 3D Objects, Particle Trails, or a Procedural Raytracer.
These properties control the core behaviours of the material using Physically Based Rendering (PBR) properties from a A Bidirectional Reflectance Distribution function. Changing the properties below can make a material appear more reflective, more dirty, or add more detail to the material surface. By using textures (either through the relevant inputs, or in the texture section), each of these properties can be modulated over a surface, for more complex material effects.
| Parameter | Details |
|---|---|
| Colour | The colour of the material. |
| Brightness | How much light the object absorbs and doesn’t reflect back into the scene. |
| Specular Colour | The colour of specular light reflected from the material. |
| Specular Intensity | Intensity of the specular reflections |
| Specularity | How much specular light is reflected from the object. |
| Specular Anisotrophy | Change the shape of the specular highlight. |
| Emissiveness | How much of a glow is emitted around the object. Requires “high dynamic range” to be turned on in the root. |
| Metallicness | Change how metallic the object looks. |
| Roughness | How rough the surface of the material is. |
| Baked Diffuse Intensity | Intensity of the texture supplied via the Diffuse channel - typically used for baked light maps. |
| Use Baked Diffuse Map As Ambient Occlusion | Sets Diffuse Map to become an ambient occlusion map |
| Fresnel Diffuse Amount | The brightness of the fresnel on the diffuse surface |
These properties control how transparent the material is. Transparency isnt always supported with some of the more advanced lighting effects, so some experimentation may be needed.
| Parameter | Details |
|---|---|
| Alpha | Change the alpha value of the material. |
| Alpha Mode | Change how the alpha image affects the material.
|
| Blend Mode | Change how the material once added to an object blends with the scene. Only functions with Alpha Mode for details. |
| Alpha Sort Bias | Biases the alpha sorting of the objects using this material, if they are transparent, so they are drawn earlier or later in the sorting order. |
These properties control a rim lighting effect, a Light which sits just behind the subject and adds a wrapping of liht around the mesh edges.
| Parameter | Details |
|---|---|
| Rim Lighting Enabled | Simulates Rim Lighting on the material with respect to the camera. |
| Rim Lighting Use Material Colour | Use the Materials Colour instead of the Rim Lighting Colour. |
| Rim Lighting Colour | Select a colour to use for Rim Lighting. Overwritten by Material Colour with Use Material Colour Enabled. |
| Rim Lighting Intensity | How strong the Rim Lighting is. |
| Rim Lighting Falloff | How far the falloff for the Rim Lighting reaches. |
These properties control the rendering settings for the material.
| Parameter | Details |
|---|---|
| Lit | Toggle whether the material can be lit by lights in the scene. |
| Casts Shadows | Toggle whether the objects the material is applied to casts shadows. |
| Environment Mapping | Toggle whether Environment Map reflections will be applied to this material. |
| Back Face Cull Mode | Changes which directions the face will be visible in.
|
| Flip Polygons | Toggles whether the polygons are flipped on the material |
| Wireframe | Toggles whether the polygons are wireframe on the material |
| Flat Shade Colours | Toggles whether the material colours are flat shaded |
Thes properties comntrol how the surface of the material is displaced at rendereing, using normal maps, heightmaps, or both.
| Parameter | Details |
|---|---|
| Normal Smoothness | Change how much smoothing is done to the edges of the object. |
| Smoothing Angle | Sets the smoothing angle of the mesh faces. The higher the smoother the result. |
| Normal Map Strength | Change how strong the normal map effect is. Only functions if a normal map is selected in the “normal map” attribute, and the normal map mode is set to “normal mapping”. |
| Normal Map Mode | Change how the normal map affects the material. |
| Normal Map - Invert Normal X | Invert the normal map along the X axis. |
| Normal Map - Invert Normal Y | Invert the normal map along the Y axis. |
| Normal Map - Invert Normal Z | Invert the normal map along the Z axis. |
| Displacement | How Much the displacement map affects the object. |
| Displacement Offset | Offset displacement amount for the displacement maps. |
| Parallax Amount | Enables Parallax Occlusion Mapping, and sets how much the material is displaced by it. |
| Displacement - Use Polygons UVs | Uses the Polygon UV’s to fix seams where the UV Map can wrap. |
| Displacement - Fix Tessellation Seams | Can fix tessellation seams where displacement maps are sampled per vertex, and can wrap across polygons. |
These properties allow textures to modulate the surfaces. Textures connected to the maaterials relevant input properties will overwrite these textures.
| Parameter | Details |
|---|---|
| Colour Texture | Select a source image to add a colour texture to the material. |
| Normal Map | Select a source image to add a normal map to the material. |
| Specular Map | Select a source image to add a specula map to the material. |
| Diffuse Map | Select a source image to add a diffuse map to the material. |
| Displacement Map | Select an image to displace the mesh based on the luminescence values of the image. Can be used with the Subdivision Levels node. |
| Roughness Map | Select an image to control how rough different areas of the material are, based on luminance. |
| Metallicness Map | Select an image to control how metallic different areas of the material are. |
| Alpha Map | Select an image to control the alpha values of different areas of the material, based on luminance. |
| Emissiveness Map | Select a source image to control how emissive an object is, based on luminance. |
These properties control how the material applies to the mesh UVs.
| Parameter | Details |
|---|---|
| UV Scale X | Scale the UV texture along the X axis. |
| UV Scale Y | Scale the UV texture along the Y axis. |
| UV Offset X | Offset the UV texture along the X axis. |
| UV Offset Y | Offset the UV texture along the Y axis. |
| Diffuse UV Scale X | Scale the Diffuse UV texture along the X axis. |
| Diffuse UV Scale Y | Scale the Diffuse UV texture along the Y axis. |
| Diffuse UV Offset X | Offset the Diffuse UV texture along the X axis. |
| Diffuse UV Offset Y | Offset the Diffuse UV texture along the Y axis. |
| Texture Filter Mode | Controls how textures used by the material are filtered - through point sampling, linear filtering or anisotropic filtering. |
| Texture Wrap Mode U | Controls how textures used by the material are wrapped when the U value range exceeds 0 to 1. |
| Texture Wrap Mode V | Controls how textures used by the material are wrapped when the V value range exceeds 0 to 1. |
| Diffuse Texture Filter Mode | Controls how textures used by the material are filtered - through point sampling, linear filtering or anisotropic filtering. |
| Diffuse Texture Wrap Mode U | Controls how textures used by the material are wrapped when the U value range exceeds 0 to 1. |
| Diffuse Texture Wrap Mode V | Controls how textures used by the material are wrapped when the V value range exceeds 0 to 1. |
| UV Remap Filtering | Enables filtering for remapping UV’s. Only functions with eligible textures. |
| Texture Mip Bias | Bias the distance at which Mip Maps are swapped for original textures. |
These properties allow you to control how vertex colours are applied to meshes, and to other parts of the PBR pipeline.